
ROCKTILE 27983
ROCKTILE 27983 Electric Guitar DIY Kit Instruction Manual
મોડલ: 27983
1. પરિચય
This instruction manual provides detailed guidance for assembling, setting up, and maintaining your ROCKTILE 27983 Electric Guitar DIY Kit. This kit allows you to build a personalized electric guitar from its core components. Please read all instructions carefully before beginning assembly to ensure proper construction and optimal performance.
2. સલામતી સૂચનાઓ
- Always wear appropriate safety gear, such as safety glasses, when working with tools.
- Exercise caution when using sharp tools, drills, or soldering equipment.
- Ensure proper ventilation if using paints, stains, or adhesives.
- નાના ભાગોને બાળકોની પહોંચથી દૂર રાખો.
- Disconnect from power sources before performing any electrical work or adjustments.
3. પેકેજ સામગ્રી
Before starting assembly, verify that all components listed below are present in your kit. Refer to the images for visual confirmation.

Image: All components of the ROCKTILE 27983 Electric Guitar DIY Kit, including the unfinished body, neck, pickups, bridge, tuners, and various hardware pieces, laid out on a white surface.
- Unfinished Guitar Body (Mahogany)
- Unfinished Guitar Neck (Mahogany neck, Blackwood fretboard)
- Humbucker Pickups (2x)
- Tune-O-Matic Bridge and Tailpiece
- Machine Heads (Tuners)
- Potentiometers (Volume/Tone controls)
- સ્વિચ ટૉગલ કરો
- આઉટપુટ જેક
- Pickguard and Control Cavity Covers
- Strap Buttons
- સ્ક્રૂ અને ફાસ્ટનર્સ
- Guitar Strings (Nickel)
- હેક્સ રેન્ચ (એડજસ્ટમેન્ટ માટે)
- કનેક્ટિંગ કેબલ
- સૂચના માર્ગદર્શિકા (આ દસ્તાવેજ)

છબી: ક્લોઝ-અપ view of the smaller components of the DIY kit, including the humbucker pickups, control knobs, potentiometers, toggle switch, bridge, tailpiece, and various screws and springs.
૪. એસેમ્બલી સૂચનાઓ (સેટઅપ)
Follow these steps carefully to assemble your electric guitar. It is recommended to test fit components before permanent installation.
4.1. Body and Neck Preparation
- Finishing (Optional): Before assembly, you may choose to sand, stain, paint, or clear coat the body and neck. Ensure all finishes are completely dry and cured before proceeding.
- Neck Pocket Fit: Carefully test fit the neck into the body's neck pocket. It should be snug but not require excessive force. If necessary, gently sand the neck heel or pocket for a perfect fit.

Image: The unfinished mahogany guitar body and neck, viewed from the back, showing the neck pocket and control cavity routing.
4.2. હાર્ડવેર ઇન્સ્ટોલેશન
- ટ્યુનર્સ: Install the machine heads (tuners) onto the headstock. Secure them with the provided screws and bushings.
- Bridge and Tailpiece: Insert the bridge and tailpiece studs into the pre-drilled holes on the guitar body. Place the bridge and tailpiece onto the studs.
- Strap Buttons: Attach the strap buttons to the designated locations on the body using the provided screws.
4.3. Pickup and Electronics Installation
- પિકઅપ્સ: Mount the humbucker pickups into their respective cavities. Secure them with the pickup rings and screws.
- Potentiometers and Switch: Install the volume and tone potentiometers, along with the toggle switch, into the control cavity. Secure them with nuts and washers.
- આઉટપુટ જેક: Install the output jack into its designated hole.
4.4. વાયરિંગ
Refer to the included wiring diagram for your specific kit. This diagram will illustrate how to connect the pickups, potentiometers, toggle switch, and output jack. Accurate soldering is crucial for proper functionality.
- Connect pickup wires to the switch and potentiometers as indicated.
- Connect potentiometers to each other and to the output jack.
- Ensure all ground wires are properly connected to prevent hum.
- Once wiring is complete, test the circuit with a multimeter or by temporarily connecting to an amplifier before closing the cavity.
4.5. અંતિમ વિધાનસભા
- પિકગાર્ડ: Attach the pickguard to the body using the small screws.
- Control Cavity Cover: Secure the control cavity cover on the back of the guitar.
- શબ્દમાળાઓ: Install the guitar strings. Thread them through the tailpiece, over the bridge, and wind them onto the tuning pegs.
5. Initial Setup and Adjustment (Operating)
After assembly, perform these adjustments for optimal playability and sound.
5.1. ટ્યુનિંગ
Tune your guitar to standard pitch (E-A-D-G-B-e) using an electronic tuner.
5.2. Action Adjustment
The 'action' refers to the height of the strings above the fretboard. Adjust the height of the Tune-O-Matic bridge using the adjustment screws on its posts. Lowering the bridge reduces action, raising it increases action. Aim for a comfortable playing height without excessive fret buzz.
5.3. Intonation Adjustment
Intonation ensures that notes played higher up the neck are in tune. To adjust, compare the open string pitch to the pitch of the 12th fret harmonic and the fretted note at the 12th fret. If the fretted note is sharp, move the bridge saddle back; if it's flat, move it forward. Each string has an individual saddle screw for adjustment.
5.4. Pickup Height Adjustment
Adjust the height of the pickups using the screws on either side of each pickup. Higher pickups generally produce a louder, stronger signal, but can also cause string pull or muddiness. Lower pickups produce a cleaner, mellower tone. Experiment to find your preferred balance.
5.5. Truss Rod Adjustment (Advanced)
The truss rod adjusts the neck's relief (forward or backward bow). This is an advanced adjustment and should only be performed if necessary and with caution. Incorrect adjustment can damage the neck. If you are unsure, consult a professional guitar technician.
6. જાળવણી
Regular maintenance will prolong the life and playability of your guitar.
- સફાઈ: Wipe down the body, neck, and strings after each use with a soft, dry cloth. Use guitar-specific cleaning products for deeper cleaning.
- સ્ટ્રિંગ રિપ્લેસમેન્ટ: Replace strings regularly, typically every 1-3 months depending on usage, to maintain tone and playability.
- ફ્રેટબોર્ડ સંભાળ: Periodically clean and condition the blackwood fretboard with a suitable fretboard oil to prevent drying and cracking.
- હાર્ડવેર નિરીક્ષણ: Periodically check all screws, nuts, and bolts for tightness. Tighten any loose components carefully.
- સંગ્રહ: Store your guitar in a stable environment, away from extreme temperature changes and humidity fluctuations.
7. મુશ્કેલીનિવારણ
તમને આવી શકે તેવી સામાન્ય સમસ્યાઓના ઉકેલો અહીં આપેલા છે.
- અવાજ નહીં અથવા નબળો અવાજ:
- Check all wiring connections for loose or cold solder joints.
- Ensure the output jack is properly connected and functioning.
- Verify that the volume potentiometer is turned up.
- Test the connecting cable and ampજીવંત
- Excessive Buzzing or Hum:
- Check all ground connections in the wiring.
- Ensure proper shielding in the control cavities (if applied).
- જો પિકઅપની ઊંચાઈ તારોની ખૂબ નજીક હોય તો તેને સમાયોજિત કરો.
- Check for loose hardware vibrating against the body.
- ફ્રેટ બઝ:
- Adjust string action (raise the bridge).
- Check neck relief (truss rod adjustment, if comfortable).
- Ensure frets are level (may require professional attention).
- ખરાબ સ્વર:
- Re-adjust individual bridge saddles as described in Section 5.3.
- Ensure strings are new and properly stretched.
8. સ્પષ્ટીકરણો
| લક્ષણ | સ્પષ્ટીકરણ |
|---|---|
| મોડલ નંબર | 27983 |
| શારીરિક સામગ્રી | મહોગની |
| પાછળની સામગ્રી | રોઝવુડ |
| ગરદન સામગ્રી | મહોગની |
| ફ્રેટબોર્ડ સામગ્રી | બ્લેકવુડ |
| શબ્દમાળાઓની સંખ્યા | 6 |
| સ્કેલ લંબાઈ | 65 સે.મી |
| ગિટાર પિકઅપ રૂપરેખાંકન | એચ (હમ્બકર) |
| ગિટાર બ્રિજ સિસ્ટમ | ટ્યુન-ઓ-મેટિક |
| શબ્દમાળા સામગ્રી | નિકલ |
| સ્ટ્રિંગ ગેજ | પ્રકાશ |
| વસ્તુનું વજન | 5.4 કિલોગ્રામ |
| પેકેજ પરિમાણો | 73.2 x 49.8 x 8.2 સેમી |
9. Customization Exampલેસ
The ROCKTILE 27983 DIY kit provides a blank canvas for personal expression. Here are some examples of how customers have customized their guitars. These images are for inspiration and do not represent the default finish of the kit.

Image: A finished electric guitar with a vibrant red and yellow sunburst paint job, showcasing a classic aesthetic.

Image: A finished electric guitar featuring an intricate, abstract design with multiple bright colors, demonstrating artistic customization.
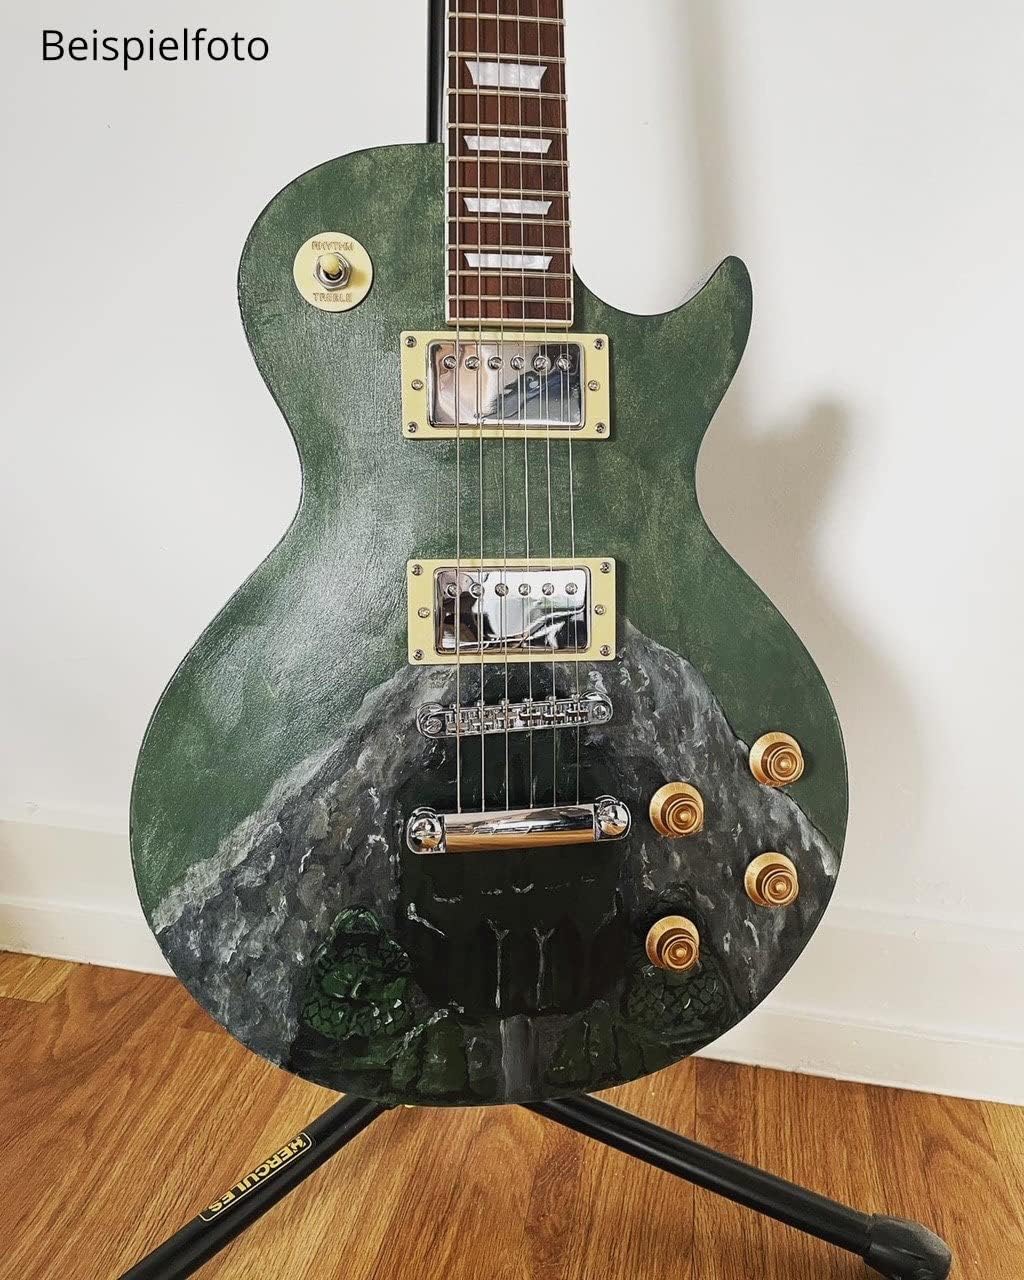
Image: A finished electric guitar with a unique green and grey painted landscape, illustrating a detailed and personalized finish.
10. વોરંટી અને સપોર્ટ
For warranty information or technical support regarding your ROCKTILE 27983 Electric Guitar DIY Kit, please refer to the documentation provided with your purchase or contact ROCKTILE customer service through their official website or your retailer. Keep your proof of purchase for any warranty claims.
Ask a question about this manual
Ask about setup, troubleshooting, compatibility, parts, safety, or missing instructions. Manuals+ will review the question and use this page’s manual context to help answer it.