
AirTies AIR-4920
AT&T Air 4920 Airties Smart Wi-Fi Extender User Manual
Model: AIR-4920 | Brand: AirTies
1. પરિચય અને ઓવરview
The AT&T Air 4920 Airties Smart Wi-Fi Extender is designed to expand the coverage and improve the signal strength of your existing Wi-Fi network. It creates a seamless mesh network, allowing your devices to automatically connect to the strongest Wi-Fi signal as you move around your home or office. This manual provides detailed instructions for setting up, operating, maintaining, and troubleshooting your Wi-Fi extender.

આકૃતિ 1: ફ્રન્ટ view of the AT&T Air 4920 Airties Smart Wi-Fi Extender.
2. પેકેજ સામગ્રી
કૃપા કરીને ચકાસો કે તમારા પેકેજમાં બધી વસ્તુઓ હાજર છે:
- AT&T Air 4920 Airties Smart Wi-Fi Extender Unit
- પાવર એડેપ્ટર
- ઝડપી શરૂઆત માર્ગદર્શિકા (આ માર્ગદર્શિકા એક વ્યાપક માર્ગદર્શિકા તરીકે કામ કરે છે)
3. ઉત્પાદન સુવિધાઓ અને ઘટકો
Familiarize yourself with the various ports, buttons, and indicator lights on your Wi-Fi Extender.

આકૃતિ 2: આગળ અને પાછળ view of the Wi-Fi Extender with labeled components.
- 5 GHz Wi-Fi Indicator: Shows the status of the 5 GHz Wi-Fi band.
- 2.4 GHz Wi-Fi Indicator: Shows the status of the 2.4 GHz Wi-Fi band.
- Power Indicator / On/Off Button: Indicates power status. Can also be used to turn the device on/off.
- WPS બટન: Used for Wi-Fi Protected Setup to quickly connect to your router.
- Gigabit Ethernet Ports (1 & 2): કમ્પ્યુટર, ગેમિંગ કન્સોલ અથવા સ્માર્ટ ટીવી જેવા ઉપકરણો સાથે વાયર્ડ કનેક્શન માટે.
- પાવર ચાલુ/બંધ સ્વિચ: A physical switch to turn the device completely off or on.
- ડીસી પાવર ઇનપુટ (12V): આપેલા પાવર એડેપ્ટરને અહીં કનેક્ટ કરો.
- રીસેટ બટન: Used to restore the device to factory default settings. (Requires a paperclip or similar pointed object).
4. સેટઅપ માર્ગદર્શિકા
Follow these steps to set up your AT&T Air 4920 Wi-Fi Extender:
૪.૧ પ્રારંભિક પ્લેસમેન્ટ
For initial setup, place the Wi-Fi Extender near your AT&T gateway (router). Once paired, you can move it to a more central location in your home where Wi-Fi signal is weak.
4.2 પાવર કનેક્શન
- Connect the provided power adapter to the DC Power Input (7) on the back of the extender.
- પાવર એડેપ્ટરને વોલ આઉટલેટમાં પ્લગ કરો.
- Ensure the Power On/Off Switch (6) is in the 'On' position. The Power Indicator (3) should light up.
4.3 Pairing with Your AT&T Gateway (Router)
There are two primary methods for pairing:
Method A: Using WPS (Wi-Fi Protected Setup) - Recommended
- દબાવો અને પકડી રાખો WPS Button (4) on the front of the Wi-Fi Extender for 2-3 seconds until the indicator lights start blinking.
- બે મિનિટમાં, દબાવો WPS બટન on your AT&T gateway (router). Refer to your gateway's manual for the exact location of its WPS button.
- Wait for the indicator lights on the extender (1, 2, and 3) to turn solid green, indicating a successful connection. This may take a few minutes as the extender updates its firmware and synchronizes with your gateway.
Method B: Using an Ethernet Cable (If WPS fails or is not preferred)
- Connect one end of an Ethernet cable (not included) to one of the Gigabit Ethernet Ports (5) on the back of the extender.
- Connect the other end of the Ethernet cable to an available LAN port on your AT&T gateway (router).
- The extender will automatically detect the connection and begin pairing. Wait for the indicator lights (1, 2, and 3) to turn solid green.
- Once paired, you can disconnect the Ethernet cable if you wish to use the extender wirelessly.
૪.૧ શ્રેષ્ઠ પ્લેસમેન્ટ
After successful pairing, unplug the extender and move it to a location roughly halfway between your AT&T gateway and the area where you need improved Wi-Fi coverage. Ensure the extender is placed in an open area, away from large metal objects, concrete walls, or other electronic devices that might cause interference. Plug it back into a power outlet. The indicator lights should turn solid green again, confirming a good connection.

Figure 3: The Wi-Fi Extender connected to its power adapter.
5. Operating Your Wi-Fi Extender
Once set up, the AT&T Air 4920 operates automatically to extend your Wi-Fi network. Your devices will seamlessly connect to the strongest signal, whether from your gateway or the extender, using your existing Wi-Fi network name (SSID) and password.
સૂચક પ્રકાશ સ્થિતિ:
- ઘન લીલા: Excellent connection and operation.
- Solid Amber/Orange: Fair connection. Consider repositioning the extender closer to your gateway.
- ઘન લાલ: No connection or poor signal. Reposition the extender or check connections.
- ઝબકવું: During WPS pairing or firmware update.
- બંધ: Device is powered off or not receiving power.
વાયર્ડ કનેક્શન્સ:
You can connect wired devices (e.g., desktop computers, smart TVs, gaming consoles) to the Gigabit Ethernet Ports (5) on the back of the extender for a stable, high-speed connection.
6. જાળવણી
To ensure optimal performance and longevity of your Wi-Fi Extender:
- સફાઈ: નરમ, સૂકા કપડાથી બહારના ભાગને ધીમેથી સાફ કરો. પ્રવાહી ક્લીનર્સ અથવા એરોસોલ્સનો ઉપયોગ કરશો નહીં.
- વેન્ટિલેશન: ઓવરહિટીંગ અટકાવવા માટે ખાતરી કરો કે વેન્ટિલેશન સ્લોટ્સ બ્લોક નથી.
- ફર્મવેર અપડેટ્સ: The extender typically receives automatic firmware updates from AT&T. Ensure it remains connected to power and your network for these updates to occur.
- પાવર સાયકલ: If you experience minor issues, try unplugging the extender from the power outlet for 10 seconds and then plugging it back in.
7. મુશ્કેલીનિવારણ
If you encounter issues with your Wi-Fi Extender, refer to the following common problems and solutions:
| સમસ્યા | સંભવિત કારણ | ઉકેલ |
|---|---|---|
| Extender lights are off. | કોઈ શક્તિ નથી. | Ensure the power adapter is securely connected and plugged into a working outlet. Check the Power On/Off Switch (6). |
| Indicator lights are red or amber. | Poor or no connection to the gateway. |
|
| Wi-Fi signal is still weak in extended areas. | Suboptimal placement. | Move the extender to a more central location between your gateway and the weak signal area. Avoid placing it in corners or behind furniture. |
| Devices not connecting to the extender. | Extender not properly paired or network issues. |
|
| Need to reset to factory settings. | Configuration issues or preparing for new setup. | With the extender powered on, use a paperclip or similar pointed object to press and hold the રીસેટ બટન (8) for about 10 seconds until the lights flash. The extender will restart with factory defaults. |
8. સ્પષ્ટીકરણો
| લક્ષણ | વિગત |
|---|---|
| મોડલ નંબર | AIR-4920 |
| ઉત્પાદનના પરિમાણો (H x W x D) | 3.94 x 4.27 x 1.63 ઇંચ (આશરે) |
| વસ્તુનું વજન | 15 ઔંસ |
| વાયરલેસ કમ્યુનિકેશન માનક | 802.11ac |
| ડેટા ટ્રાન્સફર રેટ | પ્રતિ સેકન્ડ 1000 મેગાબિટ્સ સુધી |
| કનેક્ટર પ્રકાર | RJ45 (ઇથરનેટ) |
| રંગ | સફેદ |
| ઉત્પાદક | એરટીઝ |
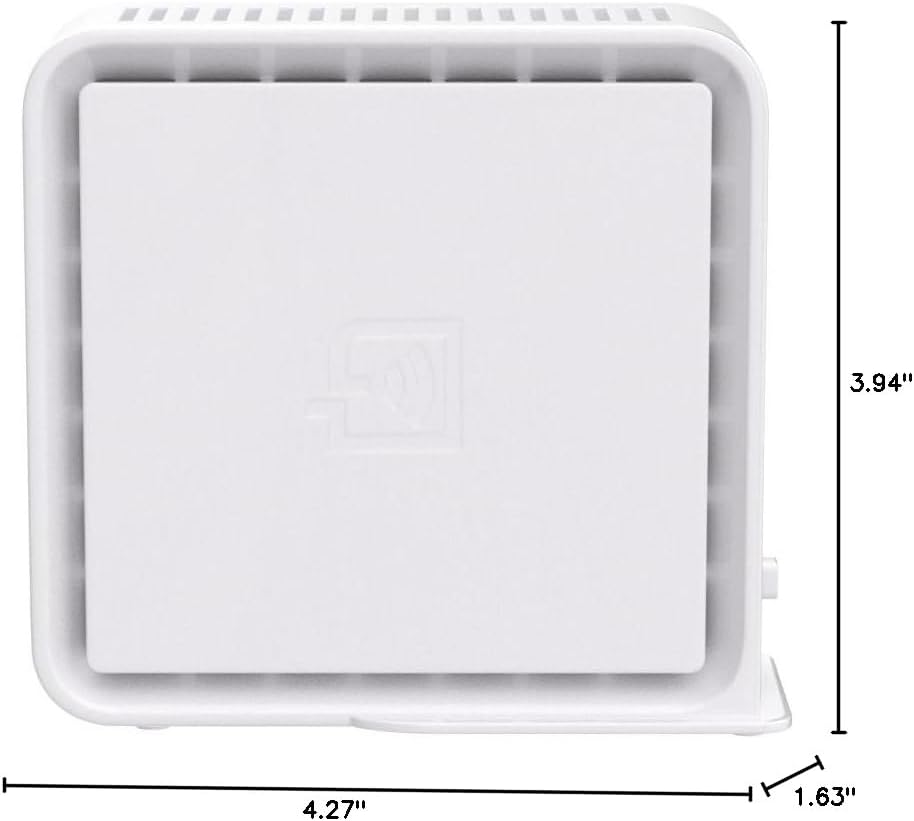
Figure 4: Approximate dimensions of the Wi-Fi Extender.
Ask a question about this manual
Ask about setup, troubleshooting, compatibility, parts, safety, or missing instructions. Manuals+ will review the question and use this page’s manual context to help answer it.