Tacklife PES01A
Tacklife PES01A Circular Saw User Manual
Model: PES01A
1. પરિચય
Thank you for choosing the Tacklife PES01A Circular Saw. This powerful and versatile tool is designed for efficient and precise cutting of various materials, including wood and plastic. Featuring a robust 1500W motor, laser guide, and adjustable cutting capabilities, it is an ideal tool for both professional and DIY projects. Please read this manual thoroughly before operation to ensure safe and effective use of your new circular saw.

Figure 1.1: Tacklife PES01A Circular Saw overview.
2. સામાન્ય સલામતી સૂચનાઓ
Always follow basic safety precautions when using electrical tools to reduce the risk of fire, electric shock, and personal injury. Keep this manual for future reference.
2.1. કાર્ય ક્ષેત્રની સલામતી
- કાર્યક્ષેત્રને સ્વચ્છ અને સારી રીતે પ્રકાશિત રાખો. અવ્યવસ્થિત અથવા અંધારાવાળા વિસ્તારો અકસ્માતોને આમંત્રણ આપે છે.
- વિસ્ફોટક વાતાવરણમાં, જેમ કે જ્વલનશીલ પ્રવાહી, વાયુઓ અથવા ધૂળની હાજરીમાં પાવર ટૂલ્સનું સંચાલન કરશો નહીં. પાવર ટૂલ્સ સ્પાર્ક બનાવે છે જે ધૂળ અથવા ધૂમાડાને સળગાવી શકે છે.
- પાવર ટૂલ ચલાવતી વખતે બાળકો અને નજીકના લોકોને દૂર રાખો. વિચલિત થવાથી તમે નિયંત્રણ ગુમાવી શકો છો.
2.2. વિદ્યુત સલામતી
- પાવર ટૂલ પ્લગ આઉટલેટ સાથે મેળ ખાતા હોવા જોઈએ. પ્લગને કોઈપણ રીતે સંશોધિત કરશો નહીં.
- પાઈપો, રેડિએટર્સ, રેન્જ અને રેફ્રિજરેટર્સ જેવી માટીવાળી અથવા જમીનવાળી સપાટી સાથે શરીરના સંપર્કને ટાળો. જો તમારું શરીર માટી અથવા ગ્રાઉન્ડેડ હોય તો ઇલેક્ટ્રિક શોકનું જોખમ વધારે છે.
- વરસાદ અથવા ભીની સ્થિતિમાં પાવર ટૂલ્સને ખુલ્લા પાડશો નહીં. પાવર ટૂલમાં પાણી પ્રવેશવાથી ઇલેક્ટ્રિક શોકનું જોખમ વધશે.
- દોરીનો દુરુપયોગ કરશો નહીં. પાવર ટૂલને વહન કરવા, ખેંચવા અથવા અનપ્લગ કરવા માટે ક્યારેય દોરીનો ઉપયોગ કરશો નહીં. દોરીને ગરમી, તેલ, તીક્ષ્ણ ધાર અથવા ફરતા ભાગોથી દૂર રાખો.
2.3. વ્યક્તિગત સલામતી
- હંમેશા આંખનું રક્ષણ કરો. સલામતી ચશ્મા અથવા ગોગલ્સનો ઉપયોગ કરો.
- લાંબા સમય સુધી સાધન ચલાવતી વખતે શ્રવણ સુરક્ષા પહેરો.
- યોગ્ય રીતે વસ્ત્ર. છૂટક કપડાં કે ઘરેણાં ન પહેરો. તમારા વાળ અને કપડાંને ફરતા ભાગોથી દૂર રાખો.
- સાવચેત રહો, તમે શું કરી રહ્યા છો તે જુઓ અને પાવર ટૂલ ચલાવતી વખતે સામાન્ય સમજનો ઉપયોગ કરો.
- Use safety clamps or a vise to secure the workpiece. This is safer than using your hand and it frees both hands to operate the tool.
2.4. Circular Saw Specific Safety
- હાથને કટીંગ એરિયા અને બ્લેડથી દૂર રાખો. તમારો બીજો હાથ સહાયક હેન્ડલ અથવા મોટર હાઉસિંગ પર રાખો. જો બંને હાથ કરવત ધરાવે છે, તો તે બ્લેડ દ્વારા કાપી શકાતા નથી.
- વર્કપીસની નીચે પહોંચશો નહીં. રક્ષક તમને વર્કપીસની નીચે બ્લેડથી સુરક્ષિત કરી શકશે નહીં.
- વર્કપીસની જાડાઈમાં કટીંગ ઊંડાઈને સમાયોજિત કરો. વર્કપીસની નીચે બ્લેડના સંપૂર્ણ દાંત કરતાં ઓછા દેખાવા જોઈએ.
- કાપતી વખતે વર્કપીસને ક્યારેય તમારા હાથમાં અથવા તમારા પગ પર ન રાખો. વર્કપીસને સ્થિર પ્લેટફોર્મ પર સુરક્ષિત કરો.
- જ્યારે કટીંગ સહાયક છુપાયેલા વાયરિંગ અથવા તેના પોતાના કોર્ડનો સંપર્ક કરી શકે ત્યારે ઓપરેશન કરતી વખતે ઇન્સ્યુલેટેડ ગ્રિપિંગ સપાટીઓ દ્વારા પાવર ટૂલને પકડી રાખો.
- Always ensure the lower guard is closed before placing the saw down.
3. ઘટકો અને સુવિધાઓ
Familiarize yourself with the parts of your Tacklife PES01A Circular Saw before operation.

Figure 3.1: Key components of the circular saw.
- 1. શક્તિશાળી મોટર: Ensures good heat dissipation.
- 2. Laser Switch: Activates the laser guide.
- 3. 3M Power Cord & Cable Tie: Convenient for storage and use.
- 4. ડબલ સેફ્ટી સ્વિચ: Requires pressing both buttons to start, preventing accidental injury.
- 5. Rubberized Handle: For comfortable and secure grip.
- 6. સપોર્ટ હેન્ડલ: Provides additional control.
- 7. Aluminum Alloy Cover: Durable housing.
- 8. Iron Base Plate: Sturdy base for cutting.
- 9. Iron Blade Guard: Protects the blade.
સમાવિષ્ટ એસેસરીઝ:

Figure 3.2: Standard accessories included with the saw.
- 1 x Tacklife PES01A Circular Saw
- 1 x 185mm 24-Tooth TCT Blade (for wood/plastic)
- 1 x 185mm 40-Tooth TCT Blade (for wood/plastic)
- 1 x Hex Wrench (for blade changes)
- 1 x Parallel Guide Ruler
- 1 x Dust Port Adapter (35mm diameter)
- 1 x વપરાશકર્તા માર્ગદર્શિકા
- 1 x વોરંટી કાર્ડ
4. સેટઅપ અને એસેમ્બલી
૪.૨. બ્લેડ ઇન્સ્ટોલેશન/રિમૂવલ
- Ensure the saw is unplugged from the power source before attempting any blade changes.
- સ્પિન્ડલ લોક બટન દબાવો અને પકડી રાખો.
- Using the hex wrench, loosen the blade bolt by turning it counter-clockwise.
- Lift the lower blade guard and carefully remove the old blade.
- Place the new blade onto the spindle, ensuring the teeth are pointing in the direction of the arrow on the saw's guard.
- Replace the blade bolt and tighten it securely with the hex wrench while holding the spindle lock button.
- Release the spindle lock and check that the blade rotates freely and the guard moves smoothly.
4.2. Attaching the Parallel Guide Ruler
The parallel guide ruler helps achieve straight cuts parallel to the edge of the workpiece.
- Slide the guide ruler into the slot on the front of the saw's base plate.
- Adjust the ruler to the desired cutting width.
- Tighten the locking screw to secure the ruler in place.
4.3. કનેક્ટિંગ ડસ્ટ એક્સટ્રેક્શન
For a cleaner work environment, connect a vacuum cleaner to the dust port.
- Attach the 35mm dust port adapter to the dust outlet on the saw.
- Connect your vacuum cleaner hose to the adapter.
5. ઓપરેટિંગ સૂચનાઓ
5.1. કટીંગ ઊંડાઈને સમાયોજિત કરવી
The cutting depth can be adjusted to match the thickness of your material. The maximum cutting depth at 90° is 65mm (2.5 inches).

Figure 5.1: Adjusting cutting depth for straight and bevel cuts.
- Loosen the depth adjustment lever located at the rear of the saw.
- Raise or lower the base plate to the desired cutting depth. Ensure only a small portion of the blade teeth extends below the workpiece.
- ડેપ્થ એડજસ્ટમેન્ટ લીવરને મજબૂતીથી સજ્જડ કરો.
5.2. Adjusting Bevel Angle (Miter Cut)
The saw can make bevel cuts up to 45°. The maximum cutting depth at 45° is 45mm (1.8 inches).
- Loosen the bevel adjustment knob/lever at the front of the saw.
- Tilt the base plate to the desired angle (0° to 45°).
- Tighten the bevel adjustment knob/lever securely.
5.3. લેસર માર્ગદર્શિકાનો ઉપયોગ
The integrated laser guide provides a visual line for precise cutting.

Figure 5.2: The laser guide assists in making straight cuts.
- Locate the laser switch on the saw.
- Flip the switch to turn the laser on. A red laser line will project onto your workpiece, indicating the cutting path.
- Align the laser line with your marked cut line on the material.
- Turn off the laser when not in use to conserve battery (if applicable) or prevent accidental activation.
5.4. કાપો બનાવવો
હંમેશા ખાતરી કરો કે વર્કપીસ સુરક્ષિત રીતે બંધાયેલ છેampકાપતા પહેલા એડ.

Figure 5.3: Cutting a wooden board with the circular saw.

Figure 5.4: Cutting a plastic sheet with the circular saw.
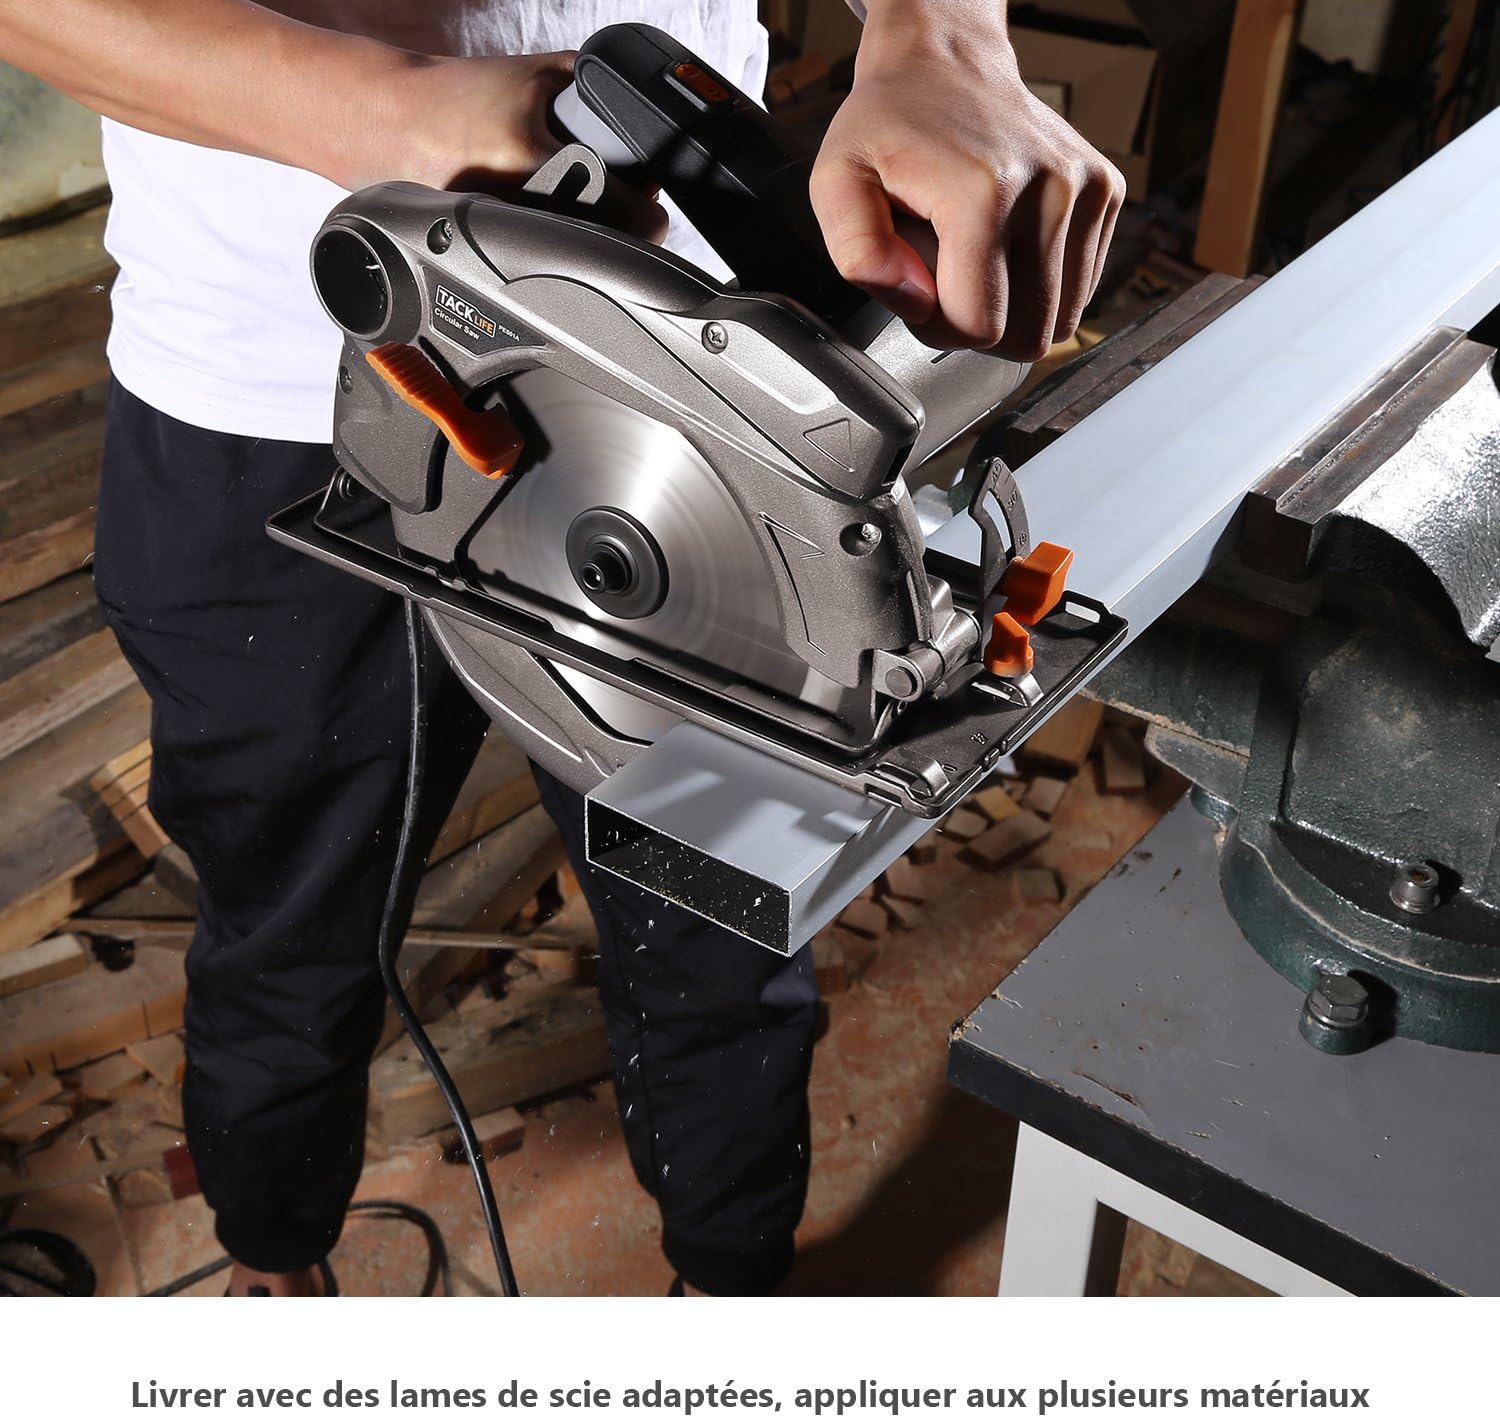
Figure 5.5: Cutting a metal profile with the circular saw (ensure appropriate blade is used).
- Plug the saw into a suitable power outlet.
- Hold the saw firmly with both hands, ensuring a stable grip on the main and auxiliary handles.
- To start the saw, press the double safety switch (requires pressing both buttons simultaneously for safety).
- કટ શરૂ કરતા પહેલા બ્લેડને સંપૂર્ણ ઝડપે પહોંચવા દો.
- Guide the saw smoothly and steadily along your marked line. Do not force the saw; let the blade do the work.
- Maintain a consistent feed rate.
- એકવાર કાપ પૂર્ણ થઈ જાય, પછી ટ્રિગર છોડી દો અને વર્કપીસમાંથી કરવત ઉપાડતા પહેલા બ્લેડને સંપૂર્ણપણે બંધ થવા દો.
- Unplug the saw after use.
6. જાળવણી
નિયમિત જાળવણી તમારા ગોળાકાર કરવતના લાંબા સમય સુધી ચાલે છે અને સલામત કામગીરી સુનિશ્ચિત કરે છે.
6.1. સફાઈ
- સફાઈ કરતા પહેલા હંમેશા કરવતને અનપ્લગ કરો.
- Use a soft brush or compressed air to remove dust and debris from the motor vents and blade guard.
- Wipe down the exterior of the saw with a damp કાપડ કઠોર રસાયણો અથવા ઘર્ષક ક્લીનર્સનો ઉપયોગ કરશો નહીં.
- Keep the base plate clean to ensure smooth gliding over the workpiece.
6.2. બ્લેડ કેર
- Inspect blades regularly for dullness, cracks, or missing teeth. Replace damaged blades immediately.
- Clean resin and pitch buildup from blades using a suitable blade cleaner.
- Store blades properly to prevent damage and corrosion.
6.3. સંગ્રહ
- કરવતને બાળકોની પહોંચથી દૂર સૂકી, સુરક્ષિત જગ્યાએ સંગ્રહિત કરો.
- સ્ટોરેજ દરમિયાન પાવર કોર્ડને નુકસાનથી બચાવો.
7. મુશ્કેલીનિવારણ
This section addresses common issues you might encounter with your circular saw.
| સમસ્યા | સંભવિત કારણ | ઉકેલ |
|---|---|---|
| સો શરૂ થતું નથી. | No power supply; Safety switch not engaged; Faulty power cord. | Check power outlet and circuit breaker; Ensure both safety switch buttons are pressed; Inspect power cord for damage. |
| Blade not cutting smoothly or burning wood. | Dull or dirty blade; Incorrect blade for material; Overfeeding the saw. | Replace or clean blade; Use appropriate blade for the material; Reduce feed rate. |
| અતિશય કંપન. | Loose blade; Damaged blade; Worn bearings. | Tighten blade bolt; Replace blade; Contact customer support if bearings are suspected. |
| Laser guide not working. | Laser switch off; Laser lens dirty; Laser module faulty. | Turn on laser switch; Clean laser lens; Contact customer support. |
| Dust collection is poor. | Dust port clogged; Vacuum not powerful enough; Hose not properly connected. | Clear dust port; Use a more powerful vacuum; Ensure hose is securely attached. |
8. ટેકનિકલ વિશિષ્ટતાઓ
| લક્ષણ | સ્પષ્ટીકરણ |
|---|---|
| મોડલ | PES01A |
| પાવર ઇનપુટ | 1500 ડબ્લ્યુ |
| ભાગtage | 230 વોલ્ટ |
| નો-લોડ સ્પીડ | 4700 RPM |
| બ્લેડ વ્યાસ | 185 મીમી (7-1/4 ઇંચ) |
| મહત્તમ કટીંગ ઊંડાઈ (90°) | 65 મીમી (2.5 ઇંચ) |
| મહત્તમ કટીંગ ઊંડાઈ (45°) | 45 મીમી (1.8 ઇંચ) |
| બેવલ ક્ષમતા | ૬° - ૫૦° |
| વજન | 4.9 કિગ્રા (10.8 lbs) |
| લેસર માર્ગદર્શિકા | હા |
| ડસ્ટ પોર્ટ વ્યાસ | 35 મીમી |
9. વોરંટી અને સપોર્ટ
Tacklife products are manufactured to high-quality standards and are warranted against defects in materials and workmanship. Please refer to the included warranty card for specific terms and conditions, including the warranty period and registration process.
આકૃતિ 9.1: ઉદાample of included warranty card.
ગ્રાહક આધાર:
For technical assistance, troubleshooting, or warranty claims, please contact Tacklife customer support. Contact information can typically be found on the warranty card or the official Tacklife webસાઇટ
- Webસાઇટ: www.tackLive.com (કૃપા કરીને સત્તાવાર તપાસો website for the most up-to-date contact information.)
- ઈમેલ: Refer to your warranty card or product packaging.
When contacting support, please have your product model (PES01A) and purchase date ready.
Ask a question about this manual
Ask about setup, troubleshooting, compatibility, parts, safety, or missing instructions. Manuals+ will review the question and use this page’s manual context to help answer it.