
1. પરિચય
This manual provides essential information for the safe and effective use of the Garosa TPA3116D2 XH M641 Audio Amplifier Board. This Class D digital power amplifier board features a TPA3116D2 chip, offering dual-channel stereo output with 150W per channel. It is designed for various audio applications, including mobile phones, computers, and home theater systems. Please read this manual thoroughly before installation and operation.
2. સલામતી માહિતી
- પાવર સપ્લાય: પાવર સપ્લાય વોલ્યુમની ખાતરી કરોtage is within the specified range of DC 12V-24V. Using an incorrect voltage can damage the board.
- ધ્રુવીયતા: Always observe correct polarity when connecting the power supply. Incorrect polarity will cause damage.
- સ્પીકર ઇમ્પિડન્સ: Connect speakers with appropriate impedance ratings to prevent damage to the ampલિફાયર અથવા સ્પીકર્સ.
- વેન્ટિલેશન: આસપાસ પર્યાપ્ત વેન્ટિલેશનની ખાતરી કરો amplifier board to prevent overheating, especially during prolonged operation at high power.
- હેન્ડલિંગ: Avoid touching components on the board while it is powered on. Static electricity can damage sensitive electronic components.
- પર્યાવરણ: Do not expose the board to moisture, dust, or extreme temperatures.
3. ઉત્પાદન ઓવરview
The Garosa TPA3116D2 XH M641 is a high-efficiency Class D digital amplifier board. It features a TPA3116D2 chip, providing robust stereo audio output. The board includes pre-amplifier and bass frequency processing, with dedicated bass volume control.
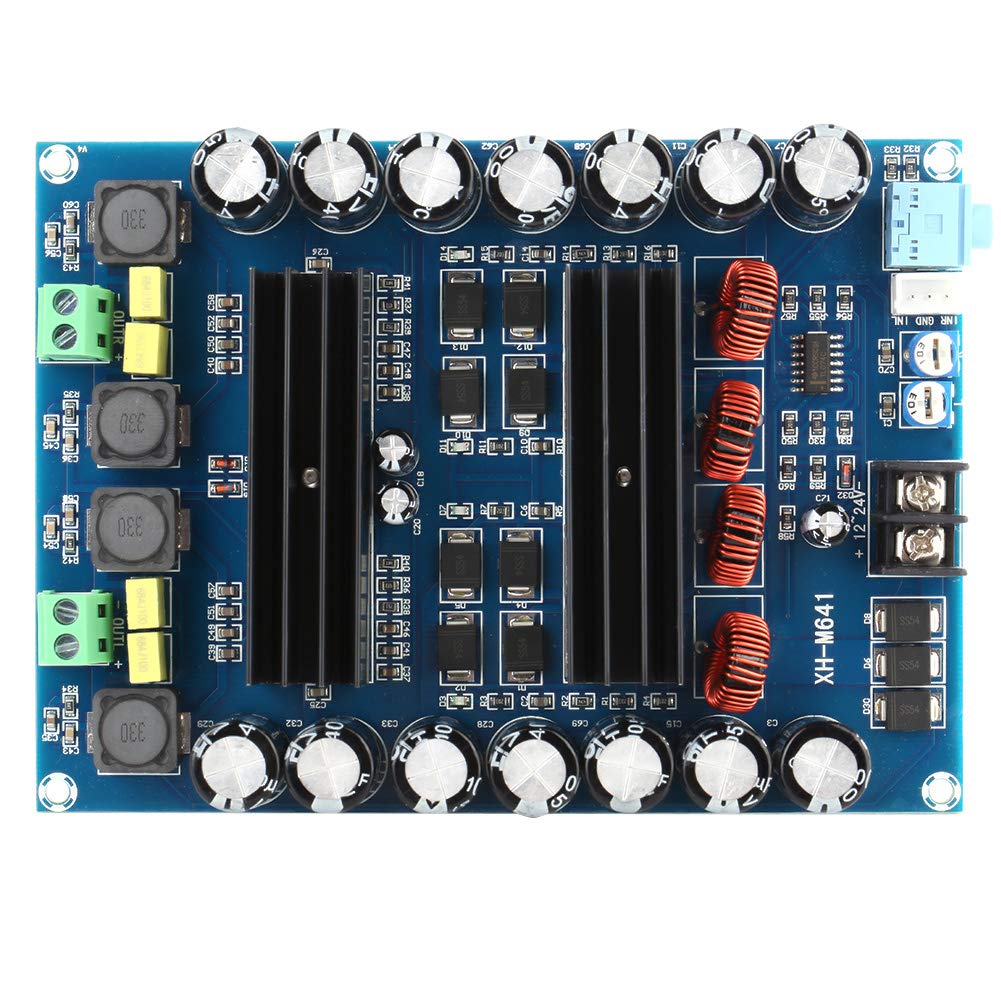
આકૃતિ 3.1: ટોચ view of the Garosa TPA3116D2 XH M641 amplifier board, showing main components including heat sinks, capacitors, and input/output terminals.
મુખ્ય લક્ષણો:
- Ampલિફાયર ચિપ: TPA3116D2
- ચેનલો: Dual Channel Stereo
- આઉટપુટ પાવર: 150 ડબલ્યુ + 150 ડબલ્યુ
- ઇનપુટ વોલ્યુમtage: ડીસી 12V-24V
- કાર્યક્ષમતા: 96% સુધી
- રક્ષણ: Short-circuit and over-heat protection
- સામગ્રી: Double-sided PCB for enhanced reliability

આકૃતિ 3.2: નીચે view ના amplifier board, illustrating the double-sided PCB construction for improved quality and reliability.
4. સેટઅપ સૂચનાઓ
તમારા સેટઅપ કરવા માટે આ પગલાં અનુસરો ampલાઇફાયર બોર્ડ:
4.1. પાવર કનેક્શન
- Identify the DC power input terminals on the board, typically marked '+12-24V' and 'GND'.
- Connect a DC power supply (12V-24V) to these terminals. Ensure correct polarity: positive to '+12-24V' and negative to 'GND'.
- It is recommended to use a power supply capable of delivering sufficient current (e.g., 13.02 Amps as per specifications) for optimal performance, especially at higher volumes.
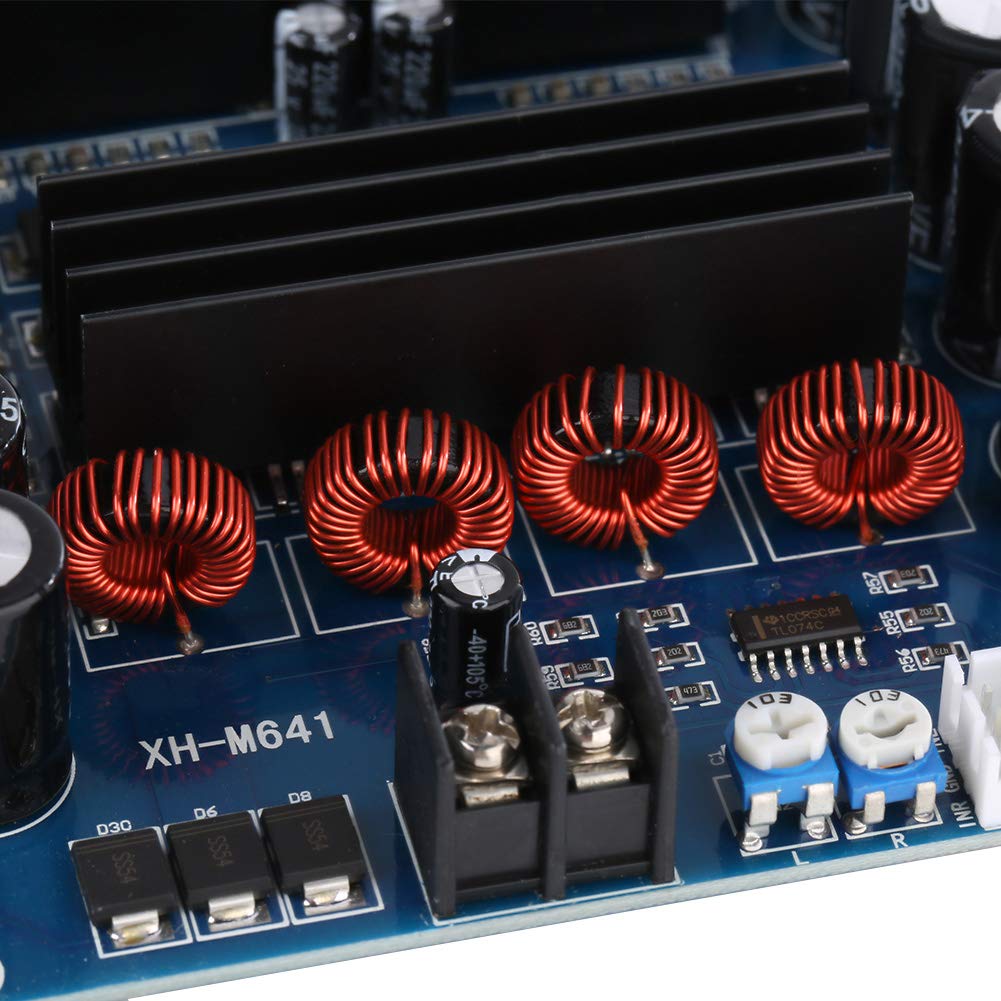
આકૃતિ 4.1: ક્લોઝ-અપ view of the DC power input terminals, showing where to connect the 12V-24V power supply.
4.2. ઓડિયો ઇનપુટ કનેક્શન
- Locate the audio input jack (typically a 3.5mm stereo jack or screw terminals for L/R/GND).
- Connect your audio source (e.g., mobile phone, computer, MP3 player) to the audio input using an appropriate cable.

Figure 4.2: Detail of the audio input jack and the bass and volume potentiometers.
4.3. સ્પીકર આઉટપુટ કનેક્શન
- Identify the speaker output terminals, usually marked 'OUT L+' 'OUT L-' for the left channel and 'OUT R+' 'OUT R-' for the right channel.
- Connect your passive speakers to these terminals. Ensure correct polarity for each speaker (positive to '+' and negative to '-').
- Verify that speaker impedance is compatible with the ampલિફાયર (સામાન્ય રીતે 4-8 ઓહ્મ).
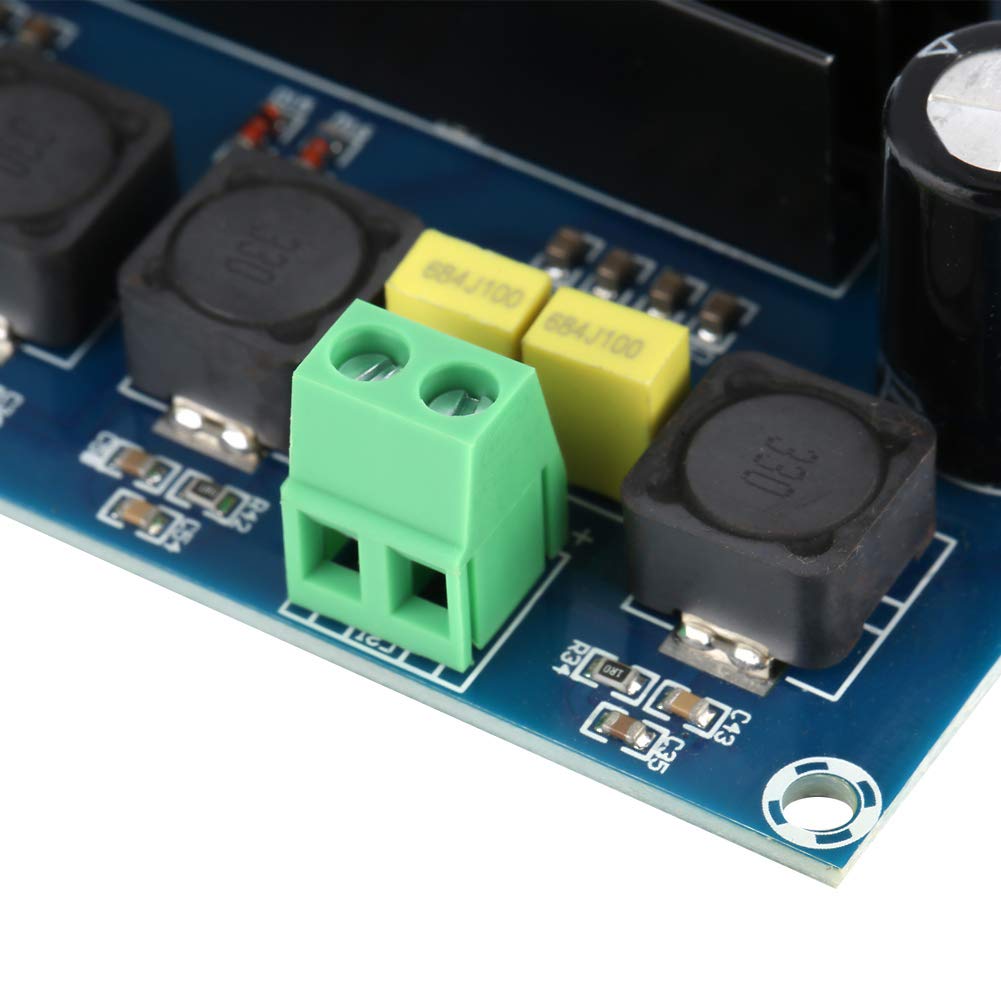
Figure 4.3: Detail of the speaker output terminals for connecting left and right channel speakers.
5. ઓપરેટિંગ સૂચનાઓ
Once all connections are securely made:
- પાવર ચાલુ: ને પાવર લાગુ કરો amplifier board. An indicator LED may illuminate to confirm power.
- વોલ્યુમ નિયંત્રણ: Adjust the main volume potentiometer to your desired listening level.
- બાસ નિયંત્રણ: Use the bass volume potentiometer to adjust the low-frequency output according to your preference.
- ઓડિયો પ્લેબેક: Start playing audio from your connected source.
- પાવર બંધ: ઉપયોગમાં ન હોય ત્યારે પાવર સપ્લાય ડિસ્કનેક્ટ કરો.
6. જાળવણી
તમારા લાંબા આયુષ્ય અને શ્રેષ્ઠ કામગીરીની ખાતરી કરવા માટે ampલાઇફાયર બોર્ડ:
- સફાઈ: Keep the board clean and free from dust. Use a soft, dry brush or compressed air to remove dust. Do not use liquid cleaners.
- નિરીક્ષણ: Periodically inspect all connections for looseness or corrosion.
- સંગ્રહ: If storing the board for an extended period, keep it in a dry, cool environment, away from direct sunlight and extreme temperatures.
- ઓવરલોડિંગ ટાળો: Do not continuously operate the amplifier at maximum volume, especially with inadequate power supply, as this can lead to overheating and premature component failure.
7. મુશ્કેલીનિવારણ
જો તમને તમારી સાથે સમસ્યાઓ આવે તો amplifier board, refer to the following table:
| સમસ્યા | સંભવિત કારણ | ઉકેલ |
|---|---|---|
| કોઈ ધ્વનિ આઉટપુટ નથી |
|
|
| વિકૃત અવાજ |
|
|
| Ampલિફાયર વધારે ગરમ થાય છે |
|
|
| પાવર સૂચક બંધ |
|
|
8. સ્પષ્ટીકરણો
| લક્ષણ | સ્પષ્ટીકરણ |
|---|---|
| મોડલ | XH M641 |
| Ampલિફાયર ચિપ | TPA3116D2 |
| ઇનપુટ વોલ્યુમtage | ડીસી 12V-24V |
| આઉટપુટ પાવર | 150W + 150W (Dual Channel) |
| ચેનલોની સંખ્યા | 2 |
| કાર્યક્ષમતા | 96% સુધી |
| Supply Current (Max) | 13.02 Amps |
| આઇટમના પરિમાણો (L x W x H) | 0.39 x 0.39 x 0.39 inches (approximate, based on provided data) |
| વસ્તુનું વજન | 0.19 કિલોગ્રામ |
| માઉન્ટિંગ પ્રકાર | સપાટી માઉન્ટ |
9. વોરંટી અને સપોર્ટ
This product is manufactured by Garosa. For specific warranty information or technical support, please refer to the retailer or manufacturer's official webસાઇટ. ખરીદીના પુરાવા તરીકે તમારી ખરીદી રસીદ રાખો.