
1. પરિચય
This manual provides detailed instructions for the installation, operation, and maintenance of your Edge Audio Xtreme Series EDX5000.1FD-E0 Monoblock Amplifier. The EDX5000.1FD-E0 is a high-performance Class D full-bridge amplifier designed for powerful audio output. Please read this manual thoroughly before attempting installation or operation to ensure proper use and to prevent damage.
1.1 સલામતી સાવચેતીઓ
- કોઈપણ વિદ્યુત જોડાણ બનાવતા પહેલા વાહનના બેટરી નેગેટિવ ટર્મિનલને હંમેશા ડિસ્કનેક્ટ કરો.
- નુકસાન અથવા શોર્ટ સર્કિટ અટકાવવા માટે ખાતરી કરો કે બધા વાયરિંગ યોગ્ય રીતે રૂટ અને સુરક્ષિત છે.
- આ માર્ગદર્શિકામાં ઉલ્લેખિત પાવર અને ગ્રાઉન્ડ કનેક્શન માટે યોગ્ય ગેજ વાયરિંગનો ઉપયોગ કરો.
- માઉન્ટ કરવાનું ટાળો amplifier in locations exposed to moisture or excessive heat.
- જો તમને ઇન્સ્ટોલેશન પ્રક્રિયાના કોઈપણ ભાગ વિશે ખાતરી ન હોય તો વ્યાવસાયિક ઇન્સ્ટોલરની સલાહ લો.
2. પેકેજ સામગ્રી
ઇન્સ્ટોલેશન સાથે આગળ વધતા પહેલા ખાતરી કરો કે બધી વસ્તુઓ પેકેજમાં હાજર છે.
- Edge Audio EDX5000.1FD-E0 Monoblock Ampજીવંત
- Remote Bass Control Unit
- Wiring for Remote Bass Control
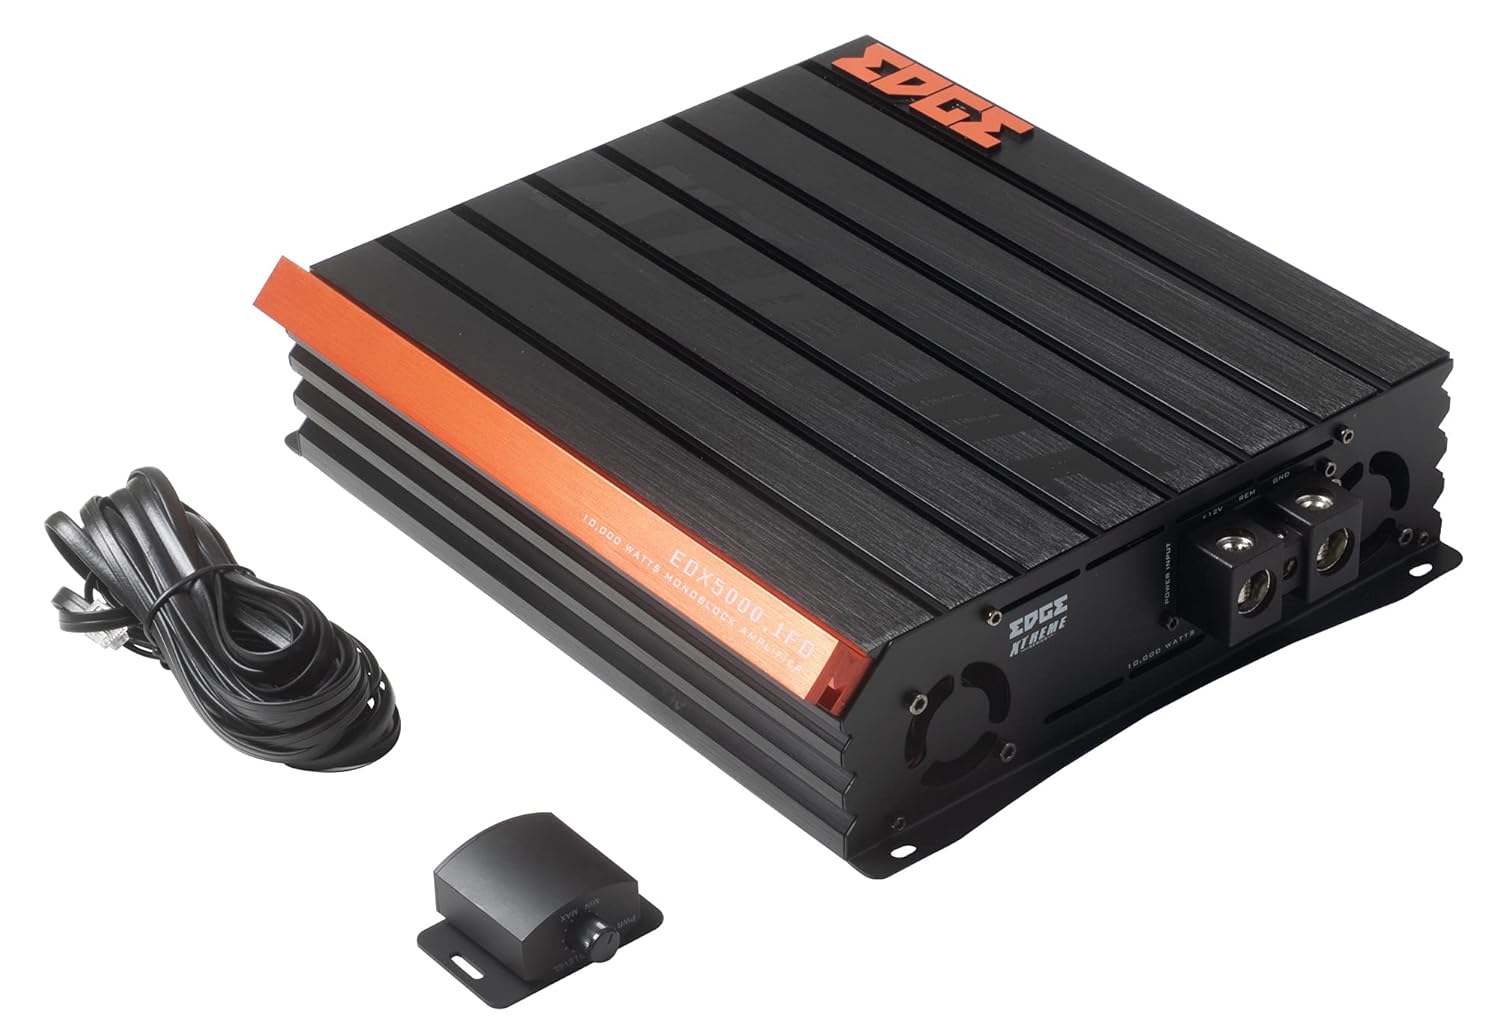
Image 2.1: Contents of the EDX5000.1FD-E0 package, including the amplifier, remote bass control, and connecting cable.

Image 2.2: The retail packaging for the Edge Audio EDX5000.1FD-E0 Monoblock Ampજીવંત
3. લક્ષણો
The Edge Audio Xtreme Series EDX5000.1FD-E0 amplifier incorporates advanced features for optimal audio performance:
- Monoblock power amplifier design for dedicated subwoofer applications.
- Max Power: 10,000 watts.
- Built-in active crossovers (High-Pass Filter and Low-Pass Filter) for precise sound shaping.
- Adjustable Bass Boost circuit for enhanced low-frequency response.
- Ultra-efficient Class D topology for high power output with minimal heat generation.
- Wideband frequency response up to 20kHz.
- Full bridge technology for efficient power delivery.
- Compact footprint for versatile installation options.
- Dimensions (H x W x D): 2.5 x 10.4 x 9.1 inches (64 x 264 x 230mm).

છબી ૧.૧: ટોચ view of the EDX5000.1FD-E0 ampલાઇફાયર, શોકasing its compact design and heatsink fins.
4. સેટઅપ અને ઇન્સ્ટોલેશન
તમારા ઉપકરણના પ્રદર્શન અને લાંબા આયુષ્ય માટે યોગ્ય ઇન્સ્ટોલેશન મહત્વપૂર્ણ છે ampઆ માર્ગદર્શિકા કાળજીપૂર્વક અનુસરો.
.4.1.૧ માઉન્ટ કરવાનું સ્થાન
માઉન્ટ કરો amplifier in a dry, well-ventilated area, away from direct sunlight or heat sources. Ensure sufficient airflow around the amplifier's heatsink. The ampલાઇફાયર સપાટી માઉન્ટિંગ માટે રચાયેલ છે.
4.2 વાયરિંગ કનેક્શન્સ
All wiring should be securely connected and insulated to prevent short circuits. Use high-quality, appropriate gauge wiring.
4.2.1 પાવર કનેક્શન્સ
કનેક્ટ કરો amplifier to the vehicle's electrical system as follows:
- +૧૨વોલ્ટ (પાવર): Connect a heavy-gauge power cable (e.g., 4 AWG or larger for 10,000W max power) directly from the positive terminal of the vehicle's battery to the +12V terminal on the amplifier. Install an appropriate fuse (not supplied) within 18 inches of the battery.
- GND (ગ્રાઉન્ડ): Connect a heavy-gauge ground cable of the same size as the power cable from the GND terminal on the amplifier to a clean, unpainted metal surface of the vehicle chassis. Ensure a solid electrical connection.
- REM (રિમોટ ટર્ન-ઓન): Connect a smaller gauge wire (e.g., 18 AWG) from the REM terminal on the amplifier to the remote turn-on output of your head unit. This wire turns the amplifier on and off with your audio system.

Image 4.1: Power input terminals (+12V, REM, GND) on the EDX5000.1FD-E0 ampજીવંત
૩.૩ ઓડિયો ઇનપુટ કનેક્શન્સ
Connect your head unit's RCA outputs to the 'LOW INPUT' RCA jacks on the ampજીવંત
4.2.3 Speaker Output Connections
Connect your subwoofer(s) to the speaker output terminals on the amplifier. Ensure correct polarity (+ to + and - to -) for optimal performance. Refer to your subwoofer's specifications for impedance matching.

Image 4.2: Rear panel of the EDX5000.1FD-E0 amplifier, showing low-level inputs, crossover controls, gain, bass boost, and speaker output terminals.
5. ઓપરેટિંગ સૂચનાઓ
એકવાર ઇન્સ્ટોલ થઈ ગયા પછી, ગોઠવો amplifier settings for optimal sound quality.
5.1 નિયંત્રણ પેનલ ઓવરview
Refer to Image 4.2 for the location of the following controls:
- HPF (હાઈ-પાસ ફિલ્ટર): Adjusts the high-pass crossover frequency. For subwoofer applications, this should typically be set to its minimum or off, as a low-pass filter is usually preferred.
- LPF (લો-પાસ ફિલ્ટર): Adjusts the low-pass crossover frequency (15Hz - 200Hz). This filters out frequencies above the set point, sending only low frequencies to the subwoofer. Set this according to your subwoofer and system requirements, typically between 60Hz and 100Hz.
- લાભ: સાથે મેળ ખાય છે amplifier's input sensitivity to the output level of your head unit. Start with the gain at minimum, then slowly increase it until you hear distortion, then back off slightly. Do not use the gain control as a volume knob.
- બેસ બુસ્ટ: Adjusts the level of bass enhancement (0dB - 12dB). Use sparingly to avoid distortion.
- FREQ (બાસ બુસ્ટ ફ્રીક્વન્સી): Selects the center frequency for the bass boost (35Hz - 70Hz).
- રીમોટ કરો: Port for connecting the wired remote bass control unit.
5.2 Remote Bass Control
The included remote bass control allows for convenient adjustment of the subwoofer output level from the driver's seat. Connect it to the 'REMOTE' port on the ampજીવંત
6. જાળવણી
નિયમિત જાળવણી તમારા આયુષ્ય અને કામગીરી સુનિશ્ચિત કરવામાં મદદ કરે છે ampજીવંત
- સફાઈ: સમયાંતરે સાફ કરો amplifier's exterior with a soft, dry cloth. Do not use harsh chemicals or abrasive cleaners. Ensure ventilation fins are free of dust and debris.
- કનેક્શન તપાસ: Annually inspect all power, ground, remote, and speaker connections for tightness and corrosion. Loose connections can cause performance issues or damage.
- પર્યાવરણ: ખાતરી કરો amplifier remains in a dry, stable environment, protected from extreme temperatures.
7. મુશ્કેલીનિવારણ
જો તમને તમારી સાથે સમસ્યાઓનો અનુભવ થાય છે amplifier, refer to the following common problems and solutions before contacting support.
- કોઈ શક્તિ નથી:
- Check the in-line fuse near the battery.
- Verify +12V, GND, and REM connections are secure and receiving power.
- Ensure the remote turn-on wire is connected to a switched 12V source.
- કોઈ અવાજ નથી:
- Check all RCA input and speaker output connections.
- Verify head unit is powered on and outputting audio.
- Adjust the GAIN control.
- વિકૃત અવાજ:
- Reduce the GAIN setting.
- Check speaker wiring for shorts or incorrect polarity.
- Ensure speaker impedance matches ampલિફાયર સ્પષ્ટીકરણો.
- Reduce BASS BOOST if active.
- Ampલાઇફિયર ઓવરહિટીંગ:
- આસપાસ પર્યાપ્ત વેન્ટિલેશનની ખાતરી કરો ampજીવંત
- Check speaker impedance; running too low an impedance can cause overheating.
- Verify power and ground wire gauge is sufficient.
8. સ્પષ્ટીકરણો
Technical specifications for the Edge Audio Xtreme Series EDX5000.1FD-E0 Monoblock Ampજીવંત:
| લક્ષણ | સ્પષ્ટીકરણ |
|---|---|
| મોડલ નંબર | EDX5000.1FD-E0 |
| બ્રાન્ડ | EDGE |
| Ampજીવંત પ્રકાર | Monoblock, Class D, Full Bridge |
| મેક્સ પાવર | 10,000 વોટ્સ |
| આવર્તન પ્રતિભાવ | 20kHz સુધી |
| Built-in Crossovers | Active (HPF, LPF) |
| બાસ બુસ્ટ | Adjustable (0-12dB) |
| બાસ બુસ્ટ આવર્તન | Adjustable (35Hz-70Hz) |
| ભાગtage | ૧ વોલ્ટ (ઓપરેટિંગ વોલ્યુમtage Range typically 12-14.4V DC for car audio) |
| માઉન્ટિંગ પ્રકાર | સપાટી માઉન્ટ |
| ઉત્પાદનના પરિમાણો (H x W x D) | 2.5 x 10.4 x 9.1 ઇંચ (64 x 264 x 230 મીમી) |
| ઉત્પાદન વજન | 6.61 પાઉન્ડ |
9. વોરંટી અને સપોર્ટ
For warranty information or technical support, please refer to the documentation provided at the time of purchase or contact your authorized Edge Audio dealer. Keep your proof of purchase for warranty claims.