
પરિચય
This manual provides detailed instructions for the safe and effective use of your pxton PX-8S-01 two-way radio. Please read this manual thoroughly before operating the device to ensure optimal performance and longevity.
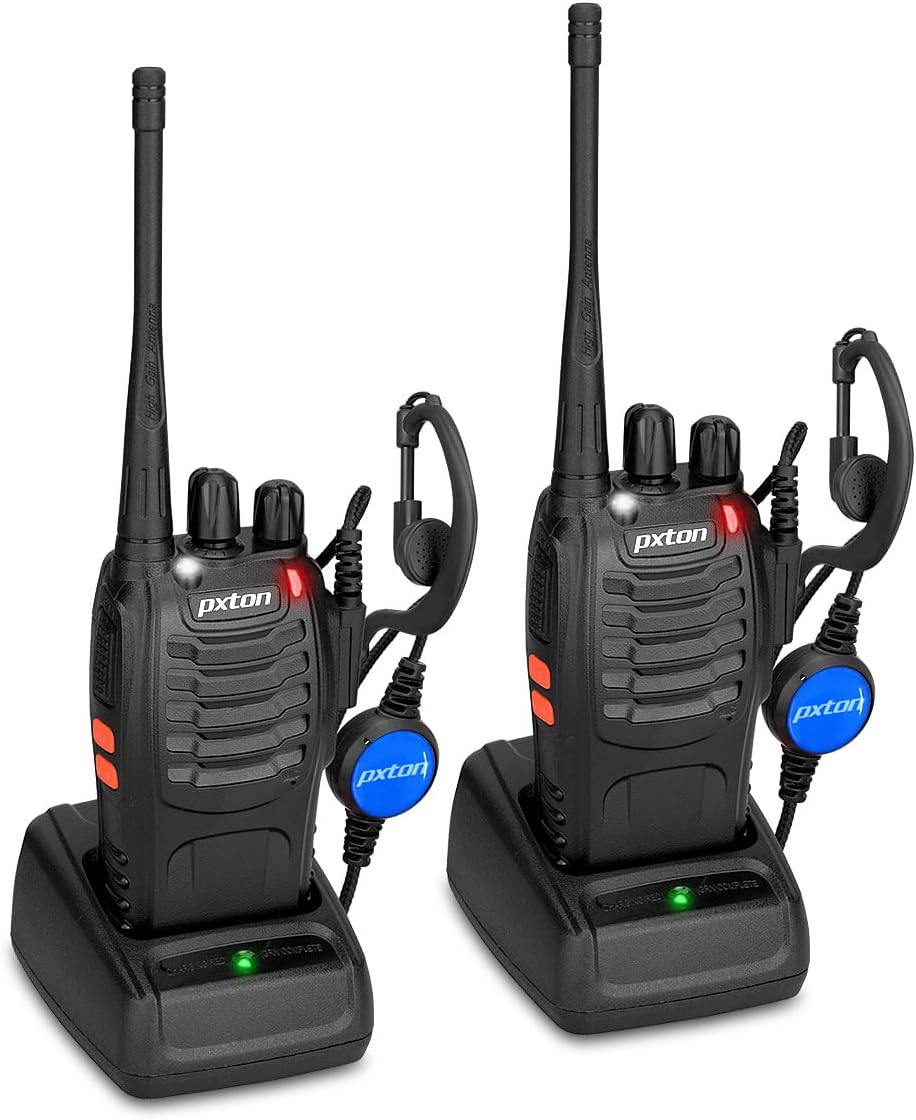
Image: Two pxton PX-8S-01 two-way radios with charging bases and earpieces.
પેકેજ સામગ્રી
ખાતરી કરો કે બધી વસ્તુઓ તમારા પેકેજમાં હાજર છે:
- pxton PX-8S-01 Two-Way Radio (2 units)
- Lithium-Ion Battery (2 units)
- USB Charger (2 units)
- Upgraded Earpiece (2 units)
- બેલ્ટ ક્લિપ (2 એકમો)
- Wrist Strap (2 units)
- Antenna (2 units)
- વપરાશકર્તા માર્ગદર્શિકા (1 એકમ)

Image: Contents of the pxton PX-8S-01 package.
ઉત્પાદન ઓવરview
Familiarize yourself with the components of your pxton PX-8S-01 two-way radio:

Image: Labeled diagram of the pxton PX-8S-01 two-way radio components.
- Integrated Sensitive Antenna: સિગ્નલો ટ્રાન્સમિટ કરવા અને પ્રાપ્ત કરવા માટે.
- ચેનલ સ્વિચ: Rotary knob to select one of the 16 available channels.
- પાવર સ્વીચ/વોલ્યુમ કંટ્રોલ: રેડિયો ચાલુ/બંધ કરવા અને વોલ્યુમ સમાયોજિત કરવા માટે રોટરી નોબ.
- ફ્લેશલાઇટ: રોશની માટે બિલ્ટ-ઇન LED લાઇટ.
- એલઇડી સૂચક: રેડિયો સ્થિતિ દર્શાવે છે (દા.ત., ટ્રાન્સમિટિંગ, રિસીવિંગ, ચાર્જિંગ).
- PTT બટન (પુશ-ટુ-ટોક): ટ્રાન્સમિટ કરવા માટે દબાવો અને પકડી રાખો, પ્રાપ્ત કરવા માટે છોડો.
- MONI Button (Monitor): Press to temporarily disable squelch and listen for weak signals.
- ફ્લેશલાઇટ બટન: બિલ્ટ-ઇન ફ્લેશલાઇટ સક્રિય કરે છે.
- SP/MIC Jacks: Ports for connecting external audio accessories like earpieces or speaker microphones.
- Clear Speaker: આઉટપુટ ઓડિયો પ્રાપ્ત થયો.
- બિલ્ટ-ઇન માઇક્રોફોન: ટ્રાન્સમિશન માટે તમારા અવાજને કેપ્ચર કરે છે.
સેટઅપ
1. બેટરી ઇન્સ્ટોલેશન
- ખાતરી કરો કે રેડિયો બંધ છે.
- બેટરી પેકને રેડિયોની પાછળના ખાંચો સાથે સંરેખિત કરો.
- બેટરી પેકને ઉપર તરફ સ્લાઇડ કરો જ્યાં સુધી તે જગ્યાએ ક્લિક ન થાય.
- દૂર કરવા માટે, રિલીઝ લેચ (જો હાજર હોય તો) દબાવો અને બેટરીને નીચેની તરફ સ્લાઇડ કરો.
2. બેટરી ચાર્જ કરી રહી છે
- Connect the USB charger to a power source.
- Place the radio with the battery installed into the charging cradle.
- The LED indicator on the charger will show the charging status (e.g., red for charging, green for fully charged).
- A full charge from 0 capacity typically takes 3-4 hours.
૩. એસેસરીઝ જોડવી
- એન્ટેના: Screw the antenna clockwise onto the connector on top of the radio until it is finger-tight. Do not overtighten.
- બેલ્ટ ક્લિપ: આપેલા સ્ક્રૂનો ઉપયોગ કરીને રેડિયોની પાછળના ભાગમાં નિયુક્ત સ્લોટમાં બેલ્ટ ક્લિપ જોડો.
- અર્પપીસ: Insert the earpiece plug into the SP/MIC jacks on the side of the radio. Ensure it is fully inserted for proper connection.
ઓપરેટિંગ સૂચનાઓ
૫.૧. પાવર ચાલુ/બંધ અને વોલ્યુમ ગોઠવણ
- To power on the radio, rotate the Power Switch/Volume Control knob clockwise. You will hear a "click" and a voice prompt indicating the current channel.
- વોલ્યુમ વધારવા માટે નોબને ઘડિયાળની દિશામાં ફેરવવાનું ચાલુ રાખો, અને તેને ઘટાડવા માટે ઘડિયાળની વિરુદ્ધ દિશામાં ફેરવો.
- To power off, rotate the knob counter-clockwise until you hear a "click."
2. ચેનલ પસંદગી
- Rotate the Channel Switch knob to select one of the 16 available channels.
- The radio will announce the selected channel number.
- ખાતરી કરો કે તમારા જૂથના બધા રેડિયો સંદેશાવ્યવહાર માટે એક જ ચેનલ પર સેટ કરેલા છે.
૫.૩. ટ્રાન્સમિટિંગ અને રિસીવિંગ
- ટ્રાન્સમિટ કરવા માટે, દબાવો અને પકડી રાખો PTT (પુશ-ટુ-ટોક) button. Speak clearly into the microphone. The LED indicator will illuminate red.
- Release the PTT button to stop transmitting and return to receive mode. The LED indicator will turn green when receiving a signal.
4. VOX (Voice Operated Exchange) Function
The VOX function allows hands-free operation. When activated, the radio will automatically transmit when it detects your voice, without needing to press the PTT button.
- VOX settings are typically programmed via software. Refer to advanced programming instructions if available.
- When using VOX, ensure the microphone is positioned correctly to pick up your voice effectively.
Image: VOX/Handfree function icon.
૮.૨. ફ્લેશલાઇટ કાર્ય
- સમર્પિત દબાવો ફ્લેશલાઇટ બટન to turn the built-in LED flashlight on or off.
Image: Flashlight function icon.
6. સ્કેન કાર્ય
The scan function allows the radio to automatically scan through channels to find active transmissions.
- To activate the scan function, typically this is done via a programmed side key or by selecting a specific channel. Refer to your radio's programming guide for details.
- When scanning, the radio will stop on an active channel until the transmission ends, then resume scanning.
7. ઇમરજન્સી એલાર્મ
The radio features an emergency alarm function for critical situations.
- To activate the emergency alarm, press the designated Emergency Alarm button (if programmed) or a specific key combination. This will typically emit a loud siren sound and/or transmit an alert signal.

Image: Emergency Alarm function icon.
8. Squelch Adjustment
Squelch suppresses background noise when no signal is being received. The PX-8S-01 has an adjustable squelch feature.
- Squelch levels are typically set via programming software. A higher squelch level requires a stronger signal to open the receiver, reducing static but potentially missing weak signals.
- The MONI button can be used to temporarily override the squelch and listen to all signals, including weak ones or background noise.
Image: Squelch adjustment icon.
9. ગોપનીયતા કોડ્સ (CTCSS/DCS)
The radio supports 165 privacy codes (50 CTCSS / 210 DCS) per programmable channel to help filter out unwanted conversations.
- When a CTCSS/DCS code is set, you will only hear transmissions from other radios using the same channel and the same CTCSS/DCS code.
- Similarly, other radios will only hear your transmissions if they are on the same channel and using the same code.
- These codes are typically programmed using specialized software.
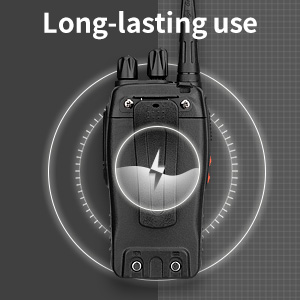
Image: CTCSS/DCS privacy codes icon.
જાળવણી
- સફાઈ: સોફ્ટનો ઉપયોગ કરો, ડીamp રેડિયોના બાહ્ય ભાગને સાફ કરવા માટે કાપડનો ઉપયોગ કરો. કઠોર રસાયણો અથવા દ્રાવકોનો ઉપયોગ કરશો નહીં.
- બેટરી સંભાળ:
- બેટરીને વધુ પડતી ચાર્જિંગ અથવા સંપૂર્ણપણે ડિસ્ચાર્જ કરવાનું ટાળો.
- જ્યારે ઉપયોગમાં ન હોય ત્યારે બેટરીને ઠંડી, સૂકી જગ્યાએ સ્ટોર કરો.
- જો રેડિયો લાંબા સમય સુધી ઉપયોગમાં ન આવે, તો બેટરી કાઢી નાખો.
- સંગ્રહ: રેડિયોને અતિશય તાપમાનથી દૂર સૂકા, ધૂળ-મુક્ત વાતાવરણમાં સંગ્રહિત કરો.
- એન્ટેના: એન્ટેનાને વાળશો નહીં કે તેમાં ફેરફાર કરશો નહીં, કારણ કે આ કામગીરીને અસર કરી શકે છે.
મુશ્કેલીનિવારણ
| સમસ્યા | સંભવિત કારણ | ઉકેલ |
|---|---|---|
| રેડિયો ચાલુ થતો નથી. | બેટરી ખતમ થઈ ગઈ છે અથવા યોગ્ય રીતે ઇન્સ્ટોલ કરેલી નથી. | બેટરી ચાર્જ કરો. ખાતરી કરો કે બેટરી સુરક્ષિત રીતે ઇન્સ્ટોલ કરેલી છે. |
| ટ્રાન્સમિટ કે પ્રાપ્ત કરી શકાતું નથી. | Incorrect channel selected. Battery low. Radio out of range. | Verify both radios are on the same channel. Charge battery. Move closer to the other radio. |
| નબળી ઑડિઓ ગુણવત્તા અથવા સ્થિર. | Weak signal. Squelch level too low/high. Interference. | Move to an area with fewer obstructions. Adjust squelch level (if programmable). Check for sources of interference. |
| Short communication range. | Obstructions (buildings, terrain). Low battery. | Move to an open area. Ensure battery is fully charged. |
| Earpiece not working. | Earpiece not fully inserted. Faulty earpiece. | Ensure earpiece plug is fully inserted into the SP/MIC jack. Try a different earpiece if available. |
વિશિષ્ટતાઓ
- મોડલ: PX-8S-01
- એફસીસી આઈડી: 2AX68PX-888S
- ચેનલોની સંખ્યા: 16
- આવર્તન શ્રેણી: યુએચએફ
- વાતચીતની મહત્તમ શ્રેણી: Up to 5 miles (unobstructed)
- ગોપનીયતા કોડ્સ: 165 (50 CTCSS / 210 DCS)
- બેટરીનો પ્રકાર: લિથિયમ આયન (શામેલ)
- બેટરી વોલ્યુમtage: 3.7 વોલ્ટ (DC)
- બેટરી જીવન: 8-96 hours standby, 8-12 hours continuous use (actual time varies with usage)
- ચાર્જિંગ સમય: 3-4 hours (from 0 capacity)
- પાણી પ્રતિકાર સ્તર: પાણી પ્રતિરોધક
- ઉત્પાદન પરિમાણો: 1.1"D x 1.89"W x 8.34"H
- વસ્તુનું વજન: ૫.૯૬ પાઉન્ડ (જોડી માટે)
- ખાસ લક્ષણો: Rechargeable, VOX, TOT, Emergency Alarm, Battery Low Alert, Flashlight, Scan Function

Image: Size comparison of the pxton PX-8S-01 radio.
સલામતી માહિતી
Your pxton PX-8S-01 walkie-talkie has been granted FCC transmission and reception certification and authorization (FCC ID: 2AX68PX-888S). This device is intended for use only within the frequency points authorized by the FCC certification range.
કૃપા કરીને નીચેના સલામતી માર્ગદર્શિકાઓનું પાલન કરો:
- વિસ્ફોટક વાતાવરણમાં (દા.ત., જ્વલનશીલ વાયુઓ, ધૂળના કણો, ધાતુના પાવડર) રેડિયો ચલાવશો નહીં.
- Do not modify the radio or its accessories. Unauthorized modifications can void your warranty and violate FCC regulations.
- રેડિયો અને તેના એસેસરીઝ બાળકોની પહોંચથી દૂર રાખો.
- Use only pxton-approved batteries and chargers. Using unapproved accessories can cause damage or injury.
- Avoid exposing the radio to extreme temperatures, direct sunlight, or moisture for prolonged periods.
- If the radio emits smoke or an unusual odor, immediately turn off the power and remove the battery. Contact customer support.
વોરંટી અને આધાર
pxton provides lifetime customer service for its walkie-talkies. If you encounter any questions or issues with your PX-8S-01 radio, please contact pxton customer support through the platform where you purchased the product. Our professional team is available to assist you with troubleshooting and support.
For further assistance, please refer to the official pxton webસાઇટ પર જાઓ અથવા તેમની ગ્રાહક સેવાનો સીધો સંપર્ક કરો.