પરિચય
This manual provides detailed instructions for the setup, operation, maintenance, and troubleshooting of your Pokitter Go Pro Mini Portable Projector. Please read this manual thoroughly before using the product to ensure proper functionality and to extend the lifespan of your device.
The Pokitter Go Pro is a compact and powerful portable projector featuring integrated Android TV 10.0, Google Assistant, 200 ANSI lumens brightness, 1080p Full HD resolution with 4K support, dual-band 2.4G/5G WiFi, and a maximum projection size of 120 inches. It is designed for versatile entertainment, offering a cinematic experience on the go.
પેકેજ સામગ્રી
કૃપા કરીને ચકાસો કે બધી વસ્તુઓ પેકેજમાં હાજર છે:
- Pokitter Go Pro Mini Portable Projector
- રીમોટ કંટ્રોલ
- પાવર એડેપ્ટર
- વપરાશકર્તા માર્ગદર્શિકા (આ દસ્તાવેજ)
- સ્ટ્રેપ કેરી

Image: The Pokitter Go Pro Mini Portable Projector, highlighting its compact design and integrated handle for easy portability.
ઉત્પાદન ઓવરview
આગળ View
The front of the projector features the projection lens and ventilation grilles.
પાછળ View
The rear panel typically includes various ports for connectivity.
- HDMI પોર્ટ: For connecting external devices like laptops, gaming consoles, or Blu-ray players.
- યુએસબી પોર્ટ: For connecting USB drives for media playback or external peripherals.
- ઓડિયો આઉટપુટ (૩.૫ મીમી જેક): બાહ્ય સ્પીકર્સ અથવા હેડફોન કનેક્ટ કરવા માટે.
- ડીસી ઇન: પાવર ઇનપુટ બંદર.
ટોચ View
The top surface may include control buttons or indicators.
બાજુ View
The sides often feature additional ventilation and a carrying handle.
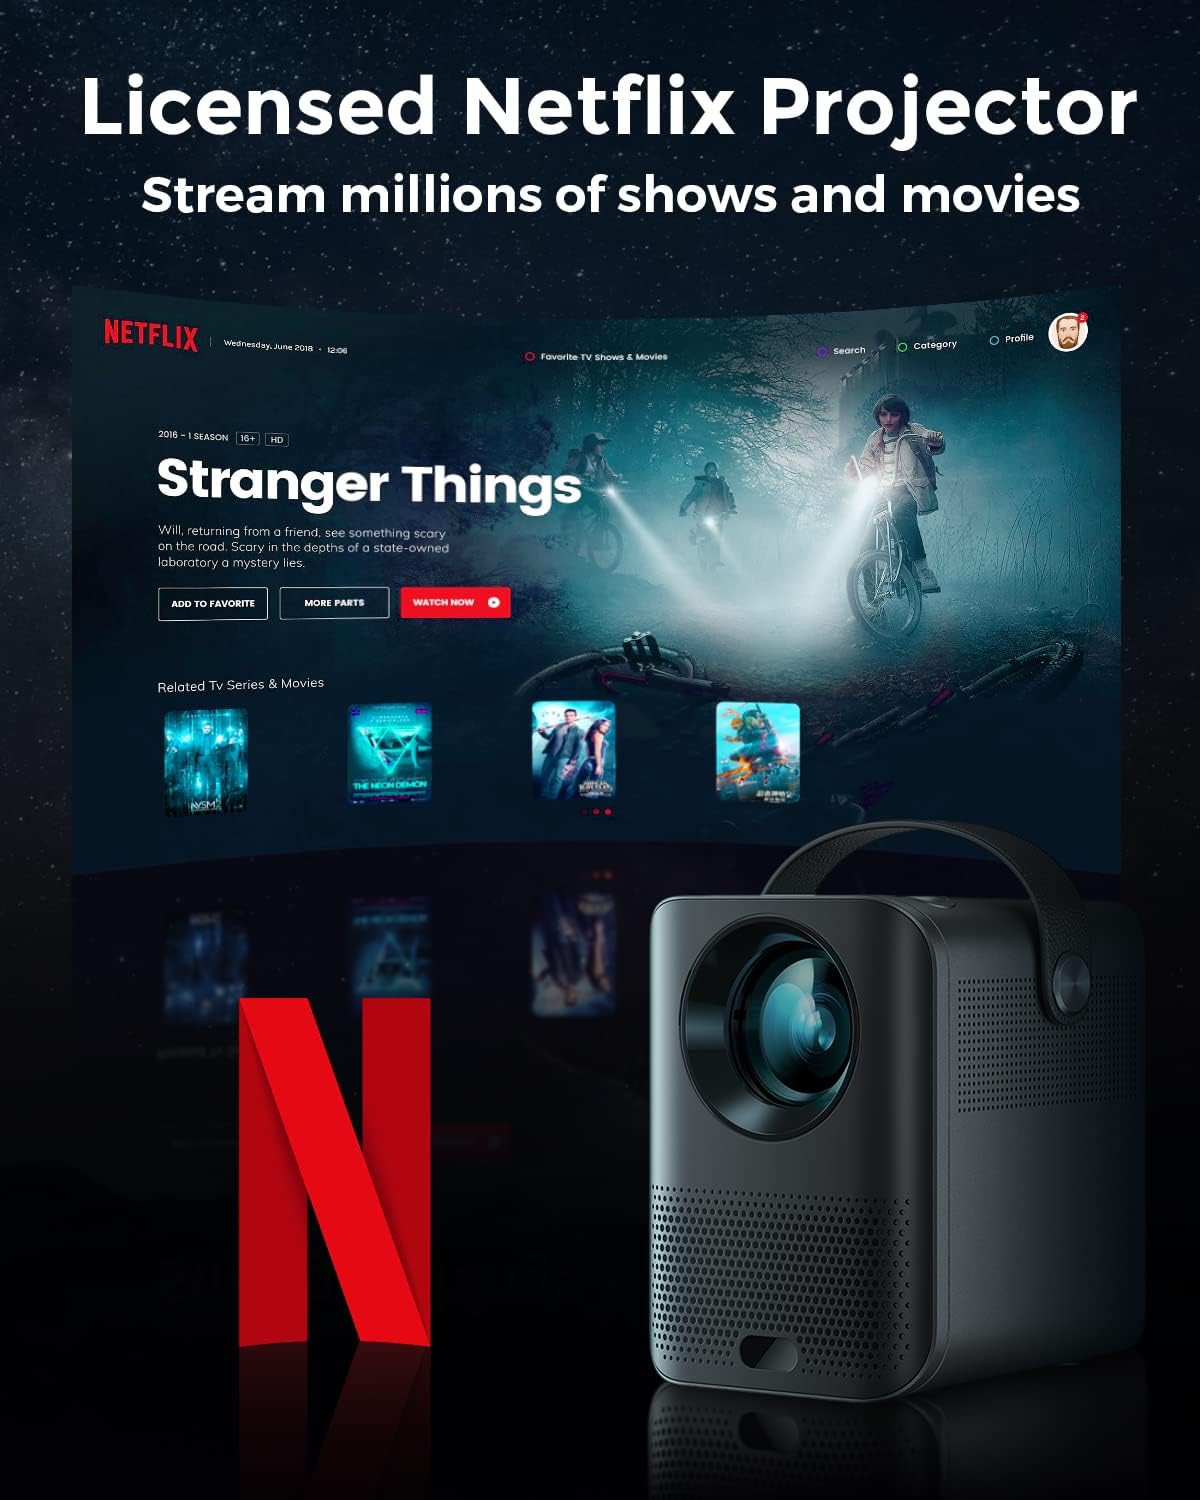
Image: The Pokitter Go Pro projector showcasing its integrated Netflix license and streaming capabilities.

Image: A size comparison of the Pokitter Go Pro projector with a smartphone, illustrating its mini and portable form factor.
સેટઅપ
1. પાવર કનેક્શન
- Connect the power adapter to the DC In port on the projector.
- પાવર એડેપ્ટરને વોલ આઉટલેટમાં પ્લગ કરો.
- પાવર ઇન્ડિકેટર લાઇટ પ્રકાશિત થશે.
2. પ્રારંભિક પાવર ચાલુ
- ઉપકરણ ચાલુ કરવા માટે પ્રોજેક્ટર અથવા રિમોટ કંટ્રોલ પર પાવર બટન દબાવો.
- Allow a few moments for the Android TV system to boot up.
3. ફોકસ એડજસ્ટમેન્ટ
Use the focus ring (if mechanical) or the remote control's focus buttons to achieve a clear image. The Pokitter Go Pro features automatic vertical keystone correction up to 40 degrees.

Image: Illustration of the automatic keystone correction feature, which adjusts the image for optimal viewing even when the projector is not perfectly aligned.
4. Screen Size Adjustment
Adjust the distance between the projector and the projection surface to achieve the desired screen size. The projector supports a screen size up to 120 inches.

Image: Guide for optimal projection distances to achieve screen sizes of 40, 80, and 120 inches.
૩.૩. નેટવર્ક કનેક્શન (Wi-Fi)
- Navigate to the Wi-Fi settings in the Android TV interface.
- સૂચિમાંથી તમારું ઇચ્છિત Wi-Fi નેટવર્ક પસંદ કરો.
- જો પૂછવામાં આવે તો પાસવર્ડ દાખલ કરો.
- The projector supports dual-band 2.4G and 5G Wi-Fi for stable and fast transmission.

Image: The Pokitter Go Pro projector demonstrating its 2.4/5GHz WiFi capabilities for seamless wireless screen casting from various devices.
ઓપરેટિંગ સૂચનાઓ
રીમોટ કંટ્રોલનો ઉપયોગ કરીને
The included remote control allows full navigation and control of the Android TV interface. Key functions include:
- પાવર બટન: પ્રોજેક્ટર ચાલુ/બંધ કરે છે.
- નેવિગેશન પેડ: For moving through menus.
- ઓકે બટન: પસંદગીની પુષ્ટિ કરે છે.
- પાછળનું બટન: પાછલી સ્ક્રીન પર પાછા ફરે છે.
- હોમ બટન: Android TV હોમ સ્ક્રીન પર પાછા ફરે છે.
- વોલ્યુમ બટનો: ઓડિયો વોલ્યુમ ગોઠવે છે.
- ગૂગલ આસિસ્ટન્ટ બટન: વૉઇસ આદેશોને સક્રિય કરે છે.
એન્ડ્રોઇડ ટીવી ઇન્ટરફેસ
The Pokitter Go Pro runs on Android TV 10.0, providing access to a wide range of streaming applications such as Netflix, YouTube, Amazon Prime Video, and Disney+.
- એપ્લિકેશન નેવિગેશન: Use the remote's navigation pad to select and open applications.
- સામગ્રી સ્ટ્રીમિંગ: Log in to your streaming accounts to access content.
- Google સહાયક: Press the Google Assistant button on the remote and speak your commands to search for content, control playback, or get information.

છબી: એક ઓવરview of the Pokitter Go Pro's key features, including its Android TV operating system, Google Assistant integration, and display capabilities.
Screen Mirroring (Chromecast Built-in)
The projector features built-in Chromecast for easy screen mirroring from compatible devices (smartphones, tablets, laptops).
- Ensure your device and the projector are connected to the same Wi-Fi network.
- Open a Chromecast-enabled app on your device (e.g., YouTube, Netflix).
- કાસ્ટ આઇકન પર ટેપ કરો (usually a rectangle with a Wi-Fi symbol) એપ્લિકેશનની અંદર.
- Select your Pokitter Go Pro projector from the list of available devices.
- The content from your device will be mirrored or cast to the projector.

Image: Demonstrating the Chromecast built-in feature, allowing users to stream content from their smartphone to the projector's large display.
Connecting External Devices (HDMI/USB)
- એચડીએમઆઈ: Connect an HDMI cable from your external device (e.g., laptop, game console) to the HDMI port on the projector. The projector will automatically switch to the HDMI input or you may need to select it from the input source menu.
- યુએસબી: Insert a USB flash drive into the USB port. The Android TV system will typically prompt you to open a file browser to access media fileડ્રાઇવ પર s.
જાળવણી
લેન્સની સફાઈ
Use a soft, lint-free cloth specifically designed for optical lenses to gently wipe the projector lens. Do not use abrasive cleaners or excessive force, as this can scratch the lens.
Cleaning the Projector Body
Wipe the exterior of the projector with a soft, dry cloth. For stubborn stains, a slightly damp cloth can be used, followed by a dry cloth. Avoid getting liquids inside the projector.
વેન્ટિલેશન
Ensure that the ventilation grilles are not blocked during operation to prevent overheating. The Pokitter Go Pro features a dust-proof design to maintain picture quality.

Image: An internal diagram of the Pokitter Go Pro, illustrating its dust-proof design for long-lasting, flawless picture quality.
સંગ્રહ
જ્યારે લાંબા સમય સુધી ઉપયોગમાં ન હોય, ત્યારે પ્રોજેક્ટરને ઠંડી, સૂકી જગ્યાએ, સીધા સૂર્યપ્રકાશ અને અતિશય તાપમાનથી દૂર રાખો. મૂળ પેકેજિંગ અથવા રક્ષણાત્મક કેસનો ઉપયોગ કરવાની ભલામણ કરવામાં આવે છે.
મુશ્કેલીનિવારણ
| સમસ્યા | સંભવિત કારણ | ઉકેલ |
|---|---|---|
| નો પાવર | પાવર કેબલ જોડાયેલ નથી; પાવર આઉટલેટ ખામીયુક્ત છે. | ખાતરી કરો કે પાવર કેબલ સુરક્ષિત રીતે જોડાયેલ છે. કોઈ અલગ પાવર આઉટલેટ અજમાવી જુઓ. |
| No Image / Blurry Image | Lens out of focus; Incorrect input source; Obstruction in projection path. | Adjust focus using the remote or focus ring. Select correct input source. Remove any obstructions. |
| કોઈ અવાજ નથી | Volume too low; Muted; External speakers not connected properly. | Increase volume. Unmute the projector. Check external speaker connections. |
| Wi-Fi કનેક્શન સમસ્યાઓ | ખોટો પાસવર્ડ; રાઉટર ખૂબ દૂર છે; નેટવર્કમાં દખલગીરી. | Wi-Fi પાસવર્ડ ચકાસો. પ્રોજેક્ટરને રાઉટરની નજીક ખસેડો. રાઉટર અને પ્રોજેક્ટરને ફરીથી શરૂ કરો. |
| રીમોટ કંટ્રોલ કામ કરતું નથી | બેટરી બંધ થઈ ગઈ; રિમોટ અને પ્રોજેક્ટર વચ્ચે અવરોધ. | બેટરી બદલો. પ્રોજેક્ટરના IR રીસીવરને સ્પષ્ટ દૃષ્ટિ રેખા મળે તેની ખાતરી કરો. |
વિશિષ્ટતાઓ
- મોડલ: F1A
- બ્રાન્ડ: પોકિટર
- ડિસ્પ્લે ટેકનોલોજી: એલઇડી
- મૂળ ઠરાવ: 1920 x 1080 (પૂર્ણ HD)
- મહત્તમ સપોર્ટેડ રિઝોલ્યુશન: 3840 x 2160 (4K)
- તેજ: 200 જેટલા એએનએસઆઈ લુમેન
- પ્રક્ષેપણ કદ: 120 ઇંચ સુધી
- ઓપરેટિંગ સિસ્ટમ: એન્ડ્રોઇડ ટીવી 10.0
- અવાજ સહાયક: Google સહાયક બિલ્ટ-ઇન
- વાયરલેસ કનેક્ટિવિટી: 2.4G/5G Dual-band Wi-Fi, Bluetooth 5.1
- કનેક્ટિવિટી બંદરો: HDMI, USB, 3.5mm Audio Out, DC In
- સ્પીકર્સ: Integrated (2x5W as per infographic)
- Average Lifespan (Light Source): 50,000 કલાક
- ફોર્મ ફેક્ટર: પોર્ટેબલ
- માઉન્ટ કરવાનો પ્રકાર: ટેબલ માઉન્ટ

Image: An illustration of the projector's internal speaker system, designed to provide true-to-life sound for a cinematic viewઅનુભવ.
વોરંટી અને આધાર
The Pokitter Go Pro Mini Portable Projector comes with a 2 વર્ષની વોરંટી. For any questions or professional assistance regarding this product, please contact Pokitter customer support. We are committed to supporting our customers.
For the latest support information, FAQs, and contact details, please visit the official Pokitter webસાઇટ પર જાઓ અથવા તમારી ખરીદી સાથે આપેલી સંપર્ક માહિતીનો સંદર્ભ લો.