
1. પરિચય
This manual provides instructions for the assembly, operation, and maintenance of your kleankin Bathroom Under-Sink Cabinet. Please read this manual thoroughly before assembly and use to ensure proper installation and safe operation. Keep this manual for future reference.

Image 1.1: The kleankin Bathroom Under-Sink Cabinet in a typical bathroom setting.
2. સલામતી સૂચનાઓ
- એસેમ્બલી જરૂરી: This product requires assembly. Please follow all assembly instructions carefully.
- Prevent Injury: Exercise caution during assembly to avoid personal injury or damage to the product.
- વજન ક્ષમતા: Do not exceed the maximum weight capacity of 40 kg for the entire cabinet and 5 kg per shelf.
- સ્થિર પ્લેસમેન્ટ: Ensure the cabinet is placed on a flat, stable surface to prevent tipping.
- પાણીનો સંપર્ક: While the material is resistant, avoid prolonged exposure to excessive water to maintain product integrity. Wipe spills immediately.
- બાળ સુરક્ષા: એસેમ્બલી દરમિયાન નાના ભાગો અને પેકેજિંગ સામગ્રી બાળકોથી દૂર રાખો.
3. પેકેજ સામગ્રી
એસેમ્બલી શરૂ કરતા પહેલા, ખાતરી કરો કે નીચે સૂચિબદ્ધ બધા ઘટકો હાજર છે અને તેમને કોઈ નુકસાન થયું નથી. જો કોઈ ભાગો ખૂટે છે અથવા ક્ષતિગ્રસ્ત છે, તો કૃપા કરીને ગ્રાહક સપોર્ટનો સંપર્ક કરો.

Image 3.1: The product is delivered in one package.
પેકેજમાં શામેલ હોવું જોઈએ:
- 1 x kleankin Bathroom Under-Sink Cabinet (unassembled components)
- 1 x Adjustable Interior Shelf
- Assembly Hardware (screws, dowels, hinges, handles, magnetic catches)
- એસેમ્બલી સૂચનાઓ (આ માર્ગદર્શિકા)
4. એસેમ્બલી સૂચનાઓ
Follow these steps carefully for proper assembly. A Phillips head screwdriver and possibly a hammer may be required (not included).
4.1. Prepare the Area
Clear a spacious, clean, and flat area for assembly. Lay out all components and hardware. Identify each part using the provided diagrams (if any are included separately).
4.2. Assemble the Cabinet Frame
Connect the side panels to the bottom and top panels using the provided hardware. Ensure all connections are secure. The cabinet features elevated feet for stability and moisture protection.
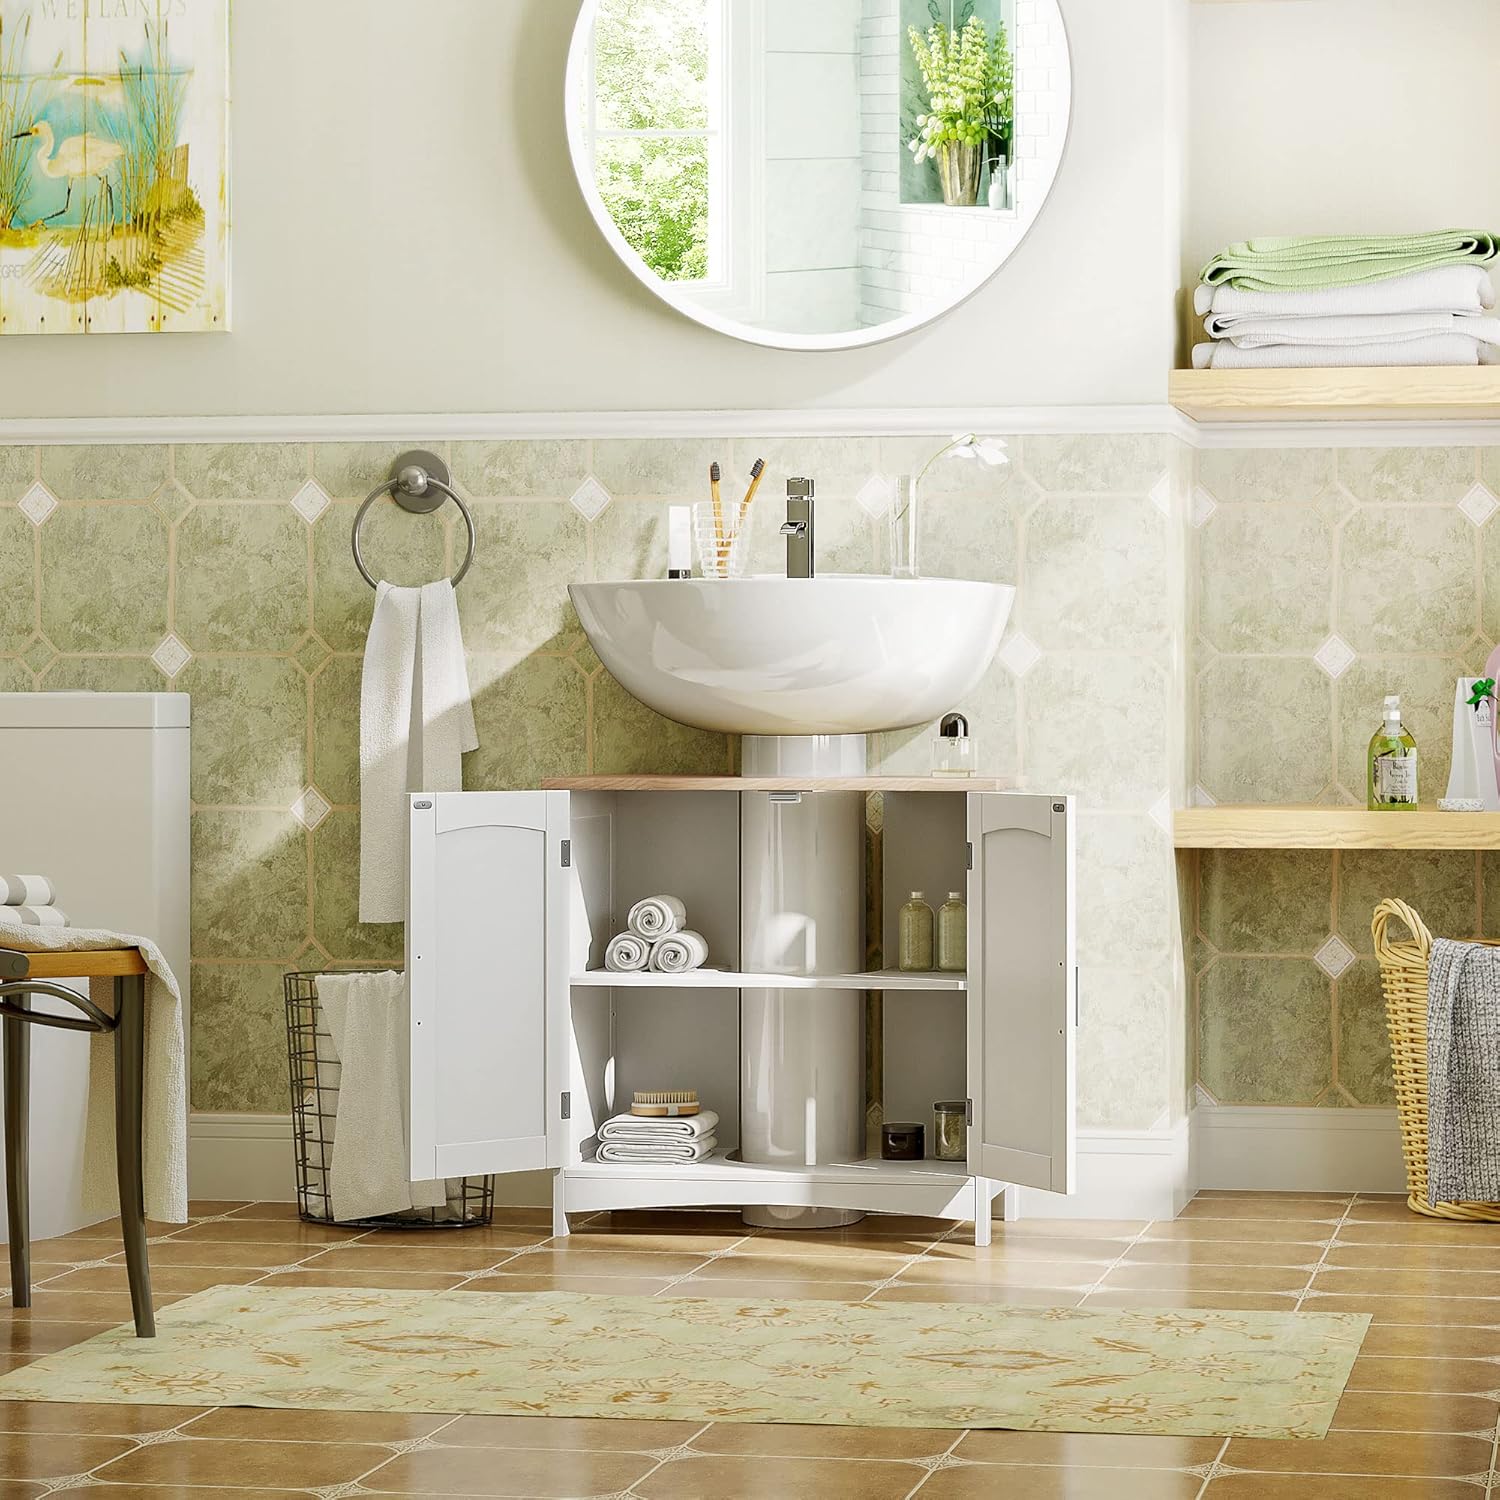
Image 4.1: Detail of aluminum alloy handles and elevated feet.
4.3. Install the Back Panel and U-Shaped Cutout
Attach the back panel. The top panel includes a 20 x 20 cm U-shaped cutout designed to accommodate sink plumbing. Ensure this cutout aligns with your sink's pipes during placement.
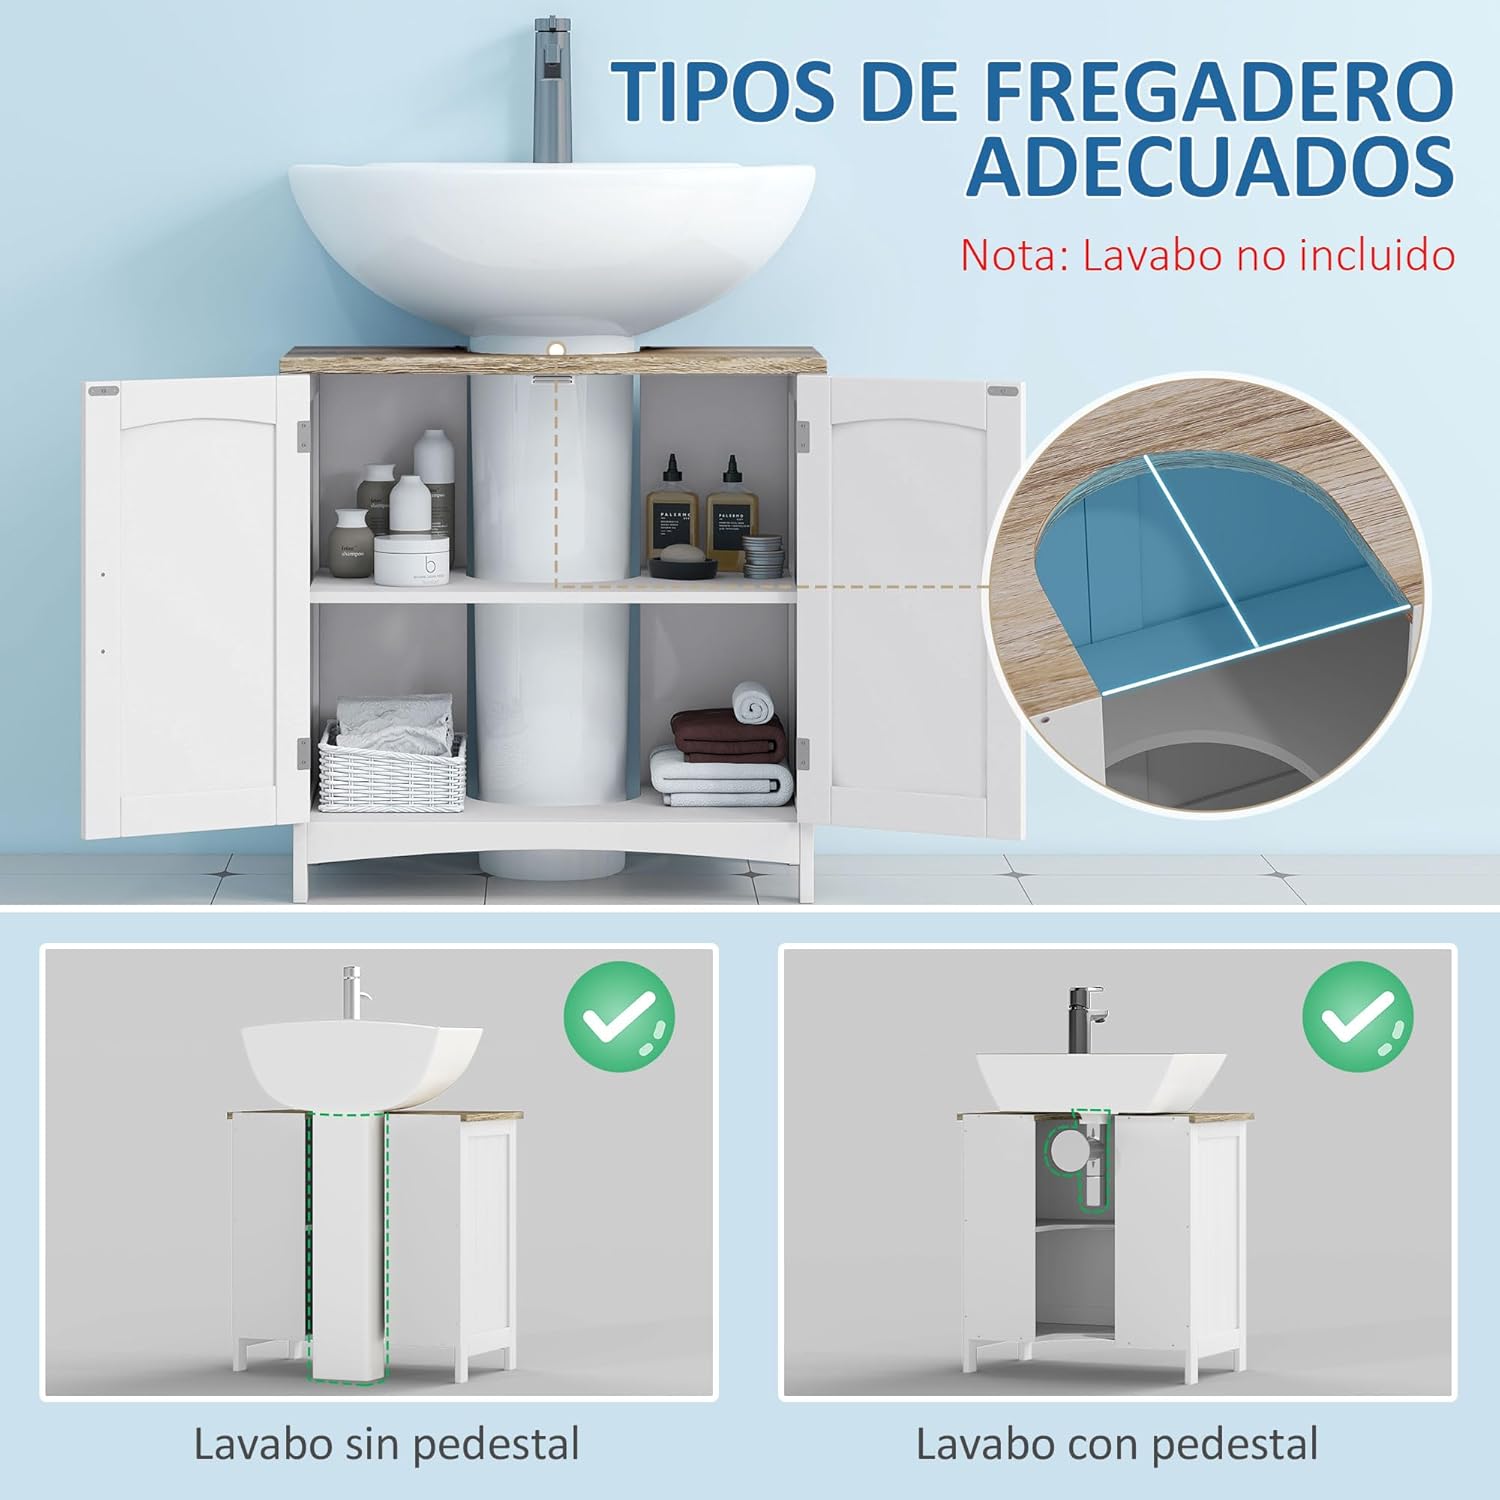
Image 4.2: Sink compatibility diagram, highlighting the U-shaped cutout for plumbing.
4.4. Install the Adjustable Shelf
Insert the shelf support pins into the desired holes on the side panels. Place the adjustable shelf on these pins. The shelf can be positioned at different heights to suit your storage needs.

Image 4.3: Adjustable shelf mechanism with multiple height options.
4.5. Attach the Doors
Mount the hinges to the cabinet doors and then attach the doors to the cabinet frame. Ensure the doors open and close smoothly. Install the aluminum alloy handles and magnetic catches.

Image 4.4: Detail of a door hinge.

Image 4.5: Detail of the magnetic catch.
4.6. Final Placement
Carefully position the assembled cabinet under your sink, ensuring the U-shaped cutout correctly accommodates the plumbing. Verify the cabinet is level and stable.
૪. સંચાલન સૂચનાઓ (ઉપયોગ)
Your kleankin under-sink cabinet is designed for convenient bathroom storage.
- સંગ્રહ: Use the interior compartments to store towels, toiletries, cleaning supplies, and other bathroom essentials.
- એડજસ્ટેબલ શેલ્ફ: To adjust the shelf height, remove items from the shelf, lift the shelf, reposition the support pins to the desired height, and then place the shelf back on the pins.
- ડોર ઓપરેશન: The doors are equipped with aluminum alloy handles for easy opening and magnetic catches to keep them securely closed.

Image 5.1: Interior storage capacity with items.
6. જાળવણી
- સફાઈ: કેબિનેટની સપાટીઓને સોફ્ટ, ડીથી સાફ કરોamp કાપડ ઘર્ષક ક્લીનર્સ અથવા કઠોર રસાયણો ટાળો જે પૂર્ણાહુતિને નુકસાન પહોંચાડી શકે.
- સ્પિલ્સ: Immediately wipe up any water spills or moisture to prevent damage to the engineered wood material.
- હાર્ડવેર તપાસ: સમયાંતરે બધા સ્ક્રૂ અને કનેક્શન કડક રહે તેની ખાતરી કરવા માટે તપાસો. જો જરૂરી હોય તો કડક કરો.
- વેન્ટિલેશન: Ensure adequate ventilation in the bathroom to minimize humidity, which can affect wood products over time.
7. મુશ્કેલીનિવારણ
- ધ્રુજારીવાળું કેબિનેટ: Ensure the cabinet is placed on a level surface. Check all assembly screws and tighten any loose ones.
- દરવાજા યોગ્ય રીતે બંધ ન થવા: Check hinge alignment. Adjust hinges if needed. Ensure magnetic catches are properly installed and aligned.
- Shelf Not Stable: Verify that the shelf support pins are fully inserted into the holes and that the shelf is resting evenly on all pins.
8. સ્પષ્ટીકરણો

Image 8.1: Product dimensions overview.
| બ્રાન્ડ | ક્લેન્કિન |
| મોડલ નંબર | 834-356એનડી |
| રંગ | સફેદ |
| સામગ્રી | એન્જિનિયર્ડ વુડ (MDF) |
| એકંદર પરિમાણો (L x D x H) | 60 x 33 x 60 સેમી |
| U-Shaped Cutout Dimensions | 20 x 20 સે.મી |
| Suitable Sink Dimensions (L x D) | Up to 50 x 20 cm |
| Max Weight Capacity (Total) | 40 કિગ્રા |
| મહત્તમ વજન ક્ષમતા (શેલ્ફ) | 5 કિગ્રા |
| દરવાજાઓની સંખ્યા | 2 |
| એડજસ્ટેબલ છાજલીઓની સંખ્યા | 1 (creating 2 compartments) |
| સ્ટોરેજ વોલ્યુમ | 79 લિટર |
| Clearance from Floor | ૯૮.૪ ઇંચ (આશરે ૨૫૦ સે.મી.) |
| એસેમ્બલી જરૂરી | હા |
| ખાસ લક્ષણો | Sturdy, Water-resistant, Modern, Adjustable, Stable |
9. વોરંટી અને સપોર્ટ
For warranty information or customer support, please refer to the retailer's policy or contact the manufacturer directly. Keep your proof of purchase for any warranty claims.