
પરિચય
The ZEBRONICS Z310 NVMe Micro-ATX Motherboard is designed for modern computing needs, supporting Intel 6th, 7th, 8th, and 9th Generation Processors with an LGA 1151 socket. It features DDR4 memory support up to 2666 MHz, an NVMe M.2 slot, 5.1 channel audio, and various connectivity options including USB 3.0, SATA, RJ45 LAN, and HDMI. This manual provides essential information for the proper installation, operation, and maintenance of your motherboard.
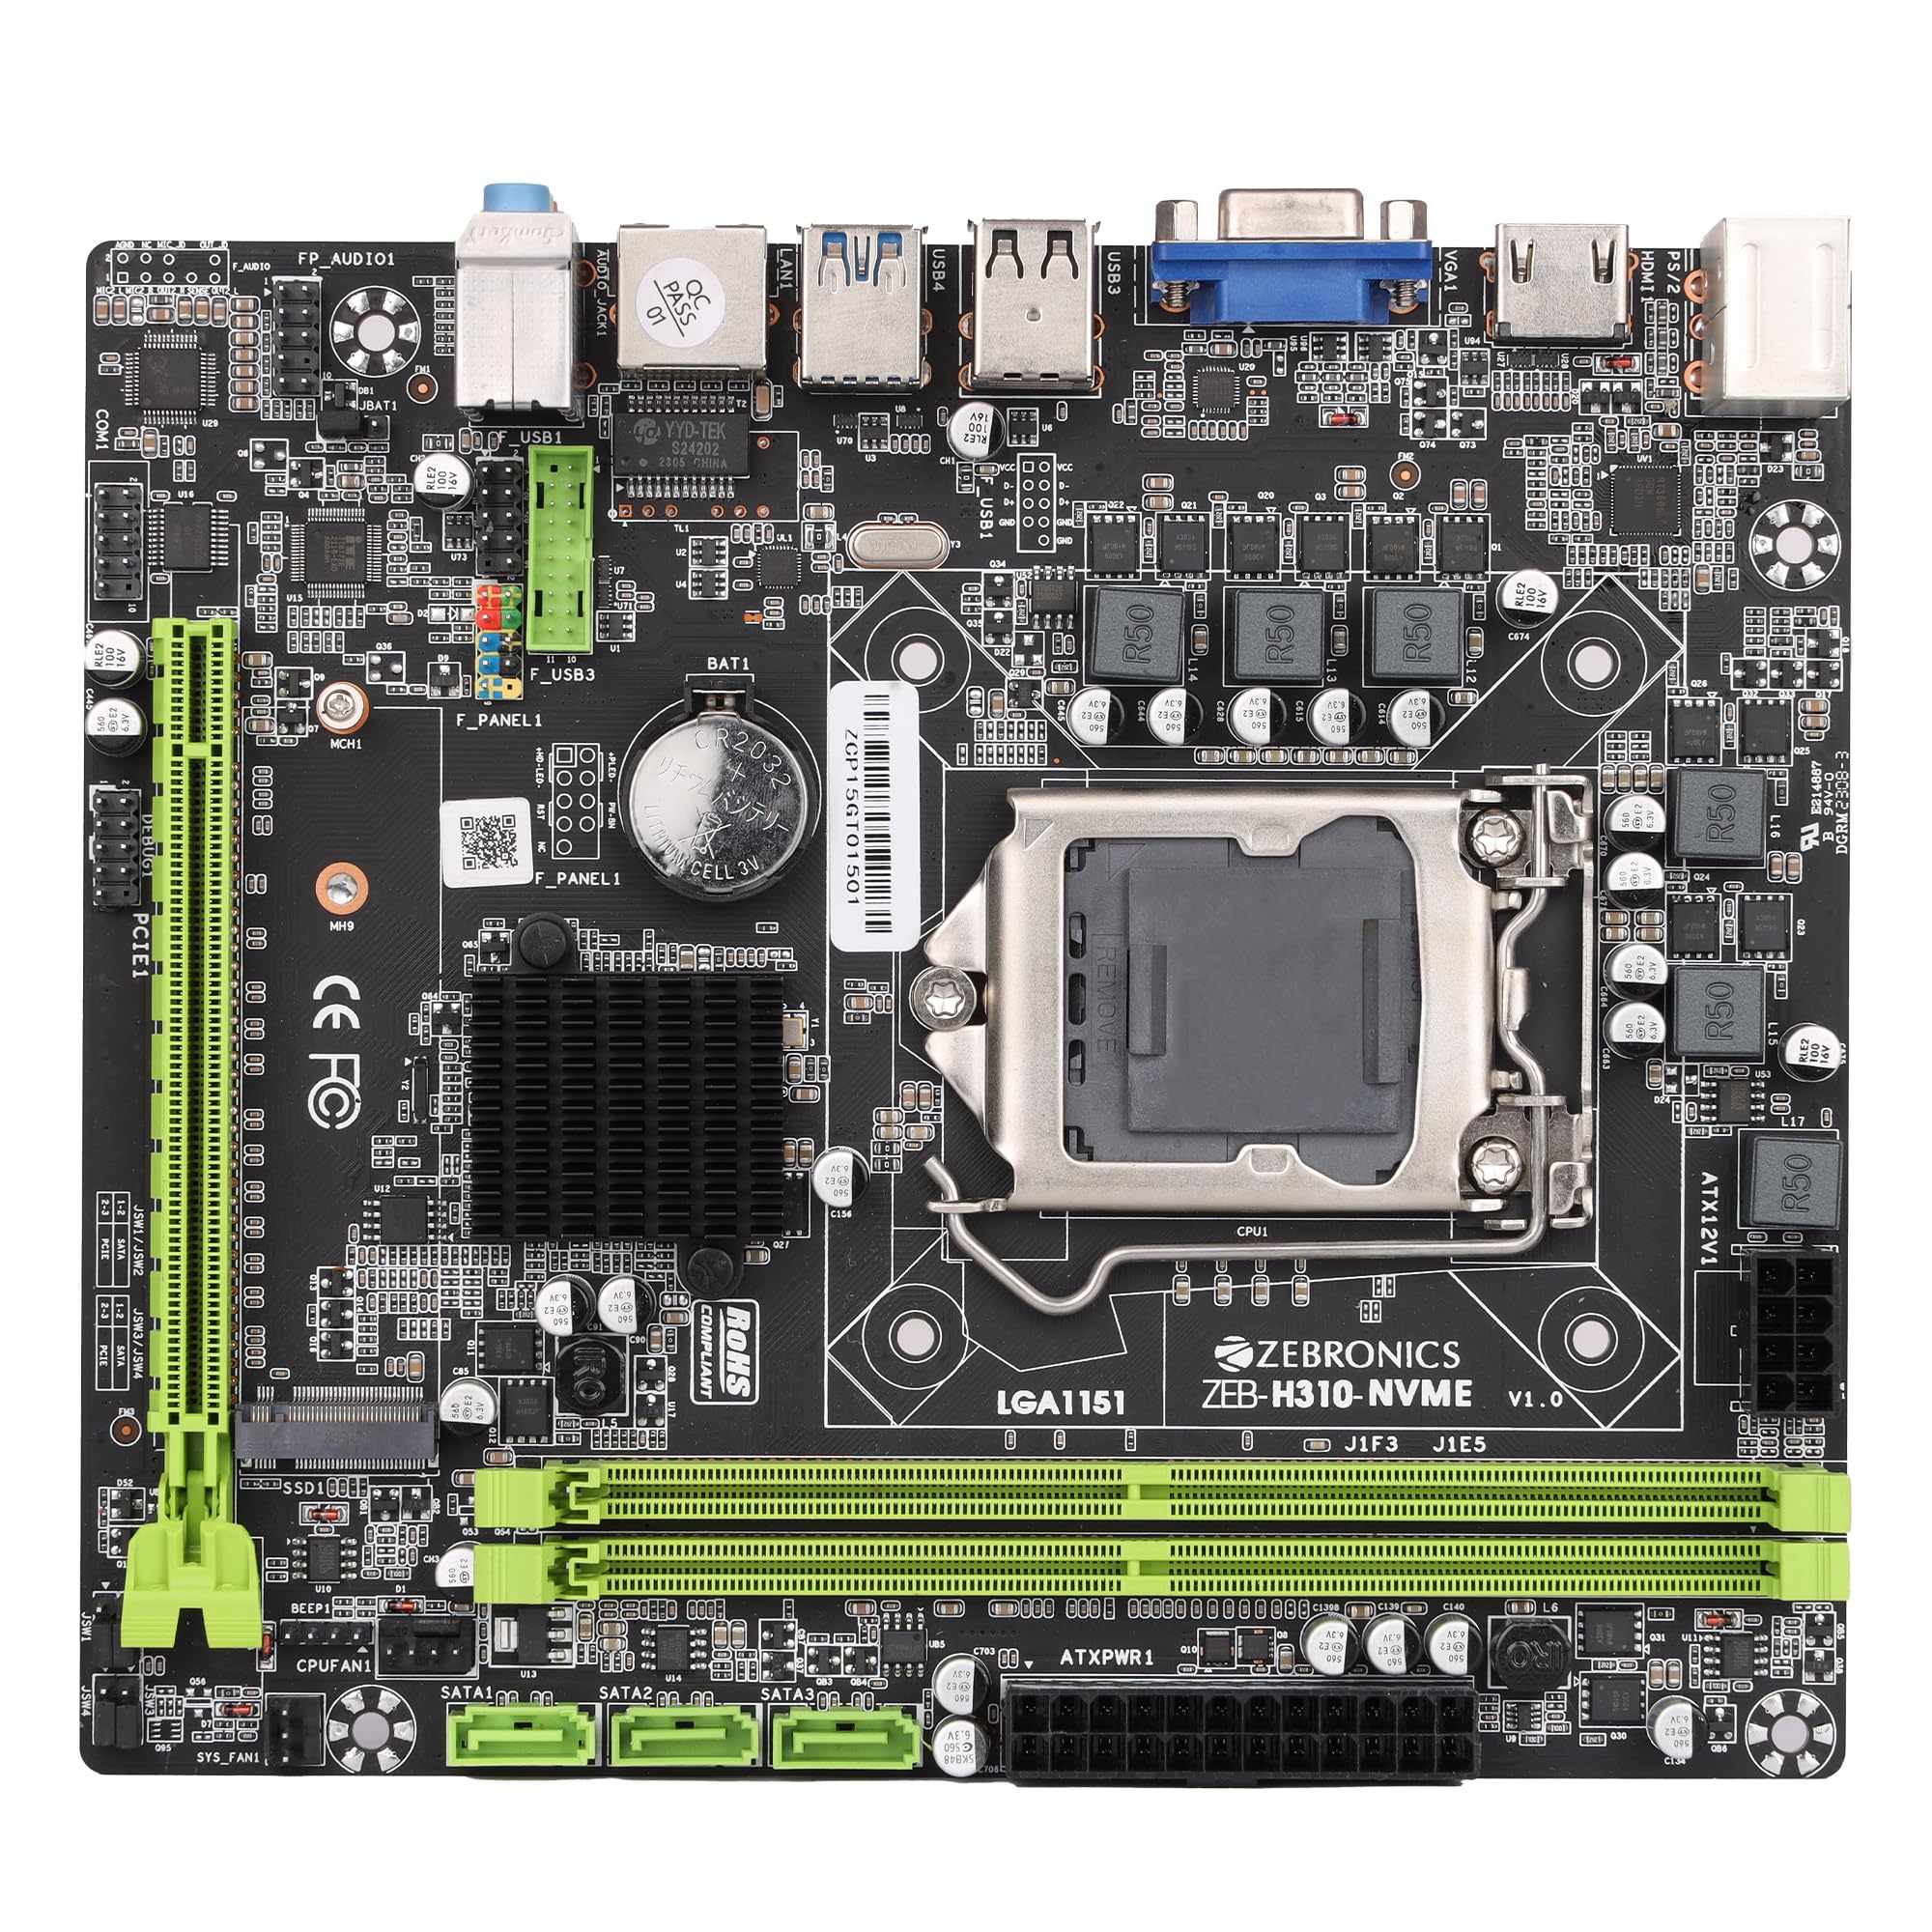
Figure 1: ZEBRONICS Z310 NVMe Micro-ATX Motherboard overview.
મુખ્ય લક્ષણો
- DDR4 મેમરી સપોર્ટ: Compatible with DDR4 memory modules, supporting speeds from 2133MHz to 2666MHz for optimal system performance.
- LGA 1151 Socket: Designed to support Intel 6th, 7th, 8th, and 9th Generation Processors, ensuring smooth data transfer and increased processing power.
- ૨.૧ ચેનલ ઓડિયો: Provides a captivating audio experience with crystal-clear sound.
- LAN કનેક્ટિવિટી: Equipped with 10/100/1000 Mbps LAN support for fast and reliable internet connection.
- PCIe 16 સ્લોટ: Facilitates seamless data transfer for graphics cards and other expansion cards.
- સંગ્રહ વિકલ્પો: Includes 3 SATA ports for connecting multiple storage devices (HDDs, SSDs) and a SATA M.2 (NVMe) slot for high-speed M.2 drives.
- યુએસબી 3.0 પોર્ટ્સ: Elevates data transfer speeds for external devices.

Figure 2: Visual representation of key features including DDR4, NVMe M.2, LGA 1151, and PCIe X16 support.
સેટઅપ અને ઇન્સ્ટોલેશન
ઇન્સ્ટોલેશન શરૂ કરતા પહેલા, ખાતરી કરો કે તમારી સિસ્ટમ પાવર બંધ છે અને દિવાલના આઉટલેટથી અનપ્લગ થયેલ છે. ઘટકોને ઇલેક્ટ્રોસ્ટેટિક ડિસ્ચાર્જ (ESD) નુકસાન અટકાવવા માટે એન્ટિ-સ્ટેટિક કાંડા પટ્ટો પહેરો.
૩.૧. CPU ઇન્સ્ટોલ કરવું
- મધરબોર્ડ પર LGA 1151 CPU સોકેટ શોધો.
- CPU સોકેટ લીવર ખોલો અને લોડ પ્લેટ ઉપાડો.
- CPU ને સોકેટ સાથે કાળજીપૂર્વક ગોઠવો, ખાતરી કરો કે CPU પરનો સુવર્ણ ત્રિકોણ સોકેટ પરના ત્રિકોણ સાથે મેળ ખાય છે. CPU ને બળજબરીથી જગ્યાએ ન મૂકો.
- લોડ પ્લેટ નીચે કરો અને તેને લીવરથી સુરક્ષિત કરો.

આકૃતિ 3: ઉપરથી નીચે view of the motherboard, showing the LGA 1151 CPU socket.
૪. RAM (DDR2 મેમરી) ઇન્સ્ટોલ કરવું
- Locate the two DDR4 DIMM slots.
- DIMM સ્લોટના બંને છેડા પર ક્લિપ્સ ખોલો.
- Align the RAM module with the slot, ensuring the notch on the RAM module matches the key in the slot.
- ક્લિપ્સ સ્થાને ન આવે ત્યાં સુધી RAM મોડ્યુલના બંને છેડા પર મજબૂત રીતે દબાવો.
૩.૩. સંગ્રહ ઉપકરણો સ્થાપિત કરી રહ્યા છીએ
- SATA ડ્રાઇવ્સ: Connect SATA data cables from your storage devices (HDDs/SSDs) to the SATA ports on the motherboard. Connect power cables from your power supply to the drives.
- NVMe M.2 Drive: Locate the M.2 slot. Insert the NVMe M.2 drive at an angle and then gently push it down. Secure it with the provided screw.

Figure 4: Labeled diagram of the motherboard highlighting various ports including SATA and M.2 interface.
4. પાવર સપ્લાય કનેક્ટ કરવું
- Connect the 24-pin ATX power connector from your power supply to the main power socket on the motherboard.
- Connect the 8-pin (or 4-pin, depending on your PSU) CPU power connector to the ATX12V socket near the CPU. Ensure all 8 pins are connected if your PSU provides an 8-pin connector for stable operation.
5. Connecting Peripherals and Front Panel
- Connect USB devices, keyboard, mouse, and display cables to the rear I/O panel.
- Connect the front panel headers (power button, reset button, HDD LED, power LED, front USB, front audio) to their respective pins on the motherboard. Refer to the motherboard diagram for correct pin alignment.

Figure 5: Rear I/O panel with various ports including PS/2, VGA, USB, LAN, and audio jacks.
ઓપરેટિંગ સૂચનાઓ
After completing the hardware installation, you can proceed with the initial boot-up and operating system installation.
- તમારા મોનિટર, કીબોર્ડ અને માઉસને કનેક્ટ કરો.
- તમારી સિસ્ટમ ચાલુ કરો.
- During boot-up, press the designated key (usually DEL or F2) to enter the BIOS/UEFI setup.
- Configure boot order to install your operating system from a USB drive or optical disc.
- Save changes and exit BIOS. The system will restart and begin the OS installation process.
- Install necessary drivers for the motherboard components (chipset, audio, LAN, etc.) from the provided driver CD or the ZEBRONICS webસાઇટ
જાળવણી
નિયમિત જાળવણી તમારા મધરબોર્ડની ટકાઉપણું અને સ્થિર કામગીરી સુનિશ્ચિત કરવામાં મદદ કરે છે.
- તેને સ્વચ્છ રાખો: Periodically clean dust from the motherboard and other components using compressed air. Ensure the system is powered off and unplugged before cleaning.
- કનેક્શન્સ તપાસો: Ensure all power and data cables are securely connected. Loose connections can cause system instability.
- BIOS અપડેટ્સ: Check the official ZEBRONICS website for BIOS/UEFI updates. Update only if necessary and follow the instructions carefully.
- પર્યાવરણીય નિયંત્રણ: Operate the motherboard in a well-ventilated area to prevent overheating.
મુશ્કેલીનિવારણ
જો તમને સમસ્યાઓ આવે, તો નીચેના સામાન્ય મુશ્કેલીનિવારણ પગલાંનો સંદર્ભ લો:
- કોઈ શક્તિ નથી:
- Ensure the power supply is connected correctly to both the 24-pin ATX and 8-pin (or 4-pin) CPU power connectors. A common issue is not fully connecting the 8-pin CPU power.
- Verify the power button is correctly connected to the front panel header.
- Check if the power supply unit (PSU) is functional.
- કોઈ ડિસ્પ્લે નથી:
- Ensure the monitor is connected to the correct video output (motherboard integrated graphics or dedicated graphics card).
- Reseat the RAM modules. Incorrectly seated RAM is a common cause of no display.
- If using a dedicated graphics card, ensure it is properly seated in the PCIe slot and has adequate power.
- સિસ્ટમ અસ્થિરતા/ક્રેશ:
- ઓવરહિટીંગ તપાસો. ખાતરી કરો કે CPU કુલર યોગ્ય રીતે ઇન્સ્ટોલ કરેલું છે અને પંખા ફરતા હોય છે.
- Verify RAM compatibility and stability. Test with one RAM stick at a time.
- ખાતરી કરો કે બધા ડ્રાઇવરો અદ્યતન છે.
- ઑડિઓ સમસ્યાઓ:
- Ensure audio cables are connected to the correct jacks on the rear I/O panel or front panel.
- Install or update audio drivers.
- તમારી ઓપરેટિંગ સિસ્ટમમાં ઓડિયો સેટિંગ્સ તપાસો.
For further assistance, consult the ZEBRONICS support webસાઇટ અથવા ગ્રાહક સેવાનો સંપર્ક કરો.
વિશિષ્ટતાઓ
| લક્ષણ | વિગત |
|---|---|
| બ્રાન્ડ | ઝેબ્રોનિકસ |
| મોડેલનું નામ | Z310 NVMe |
| CPU સોકેટ | એલજીએ 1151 |
| સુસંગત પ્રોસેસર્સ | Intel Core 6th Gen, 7th Gen, 8th Gen, 9th Gen |
| ચિપસેટ પ્રકાર | ઇન્ટેલ Z310 |
| રેમ મેમરી ટેકનોલોજી | DDR4 |
| મેમરી ઘડિયાળની ગતિ | ૧૩૩૩ મેગાહર્ટ્ઝ (૧૬૦૦ મેગાહર્ટ્ઝ સુધી સપોર્ટ કરે છે) |
| મેમરી સ્લોટ્સ ઉપલબ્ધ | 2 |
| Drive/Memory Storage Capacity (Max) | 32 જીબી |
| કુલ SATA પોર્ટ્સ | 3 |
| M.2 સ્લોટ | 1 (NVMe support) |
| ગ્રાફિક્સ કાર્ડ ઇન્ટરફેસ | પીસીઆઈ એક્સપ્રેસ |
| Total PCIe Ports | 1 (PCIe 16x) |
| કુલ યુએસબી પોર્ટ્સ | ૭ (યુએસબી ૨.૦ સહિત) |
| યુએસબી 2.0 પોર્ટ્સ | 2 |
| ઇથરનેટ પોર્ટની સંખ્યા | 1 (10/100/1000 Mbps) |
| Total HDMI Port | 1 |
| મુખ્ય પાવર કનેક્ટર પ્રકાર | 24-પિન |
| વસ્તુનું વજન | 800 ગ્રામ |
| આઇટમના પરિમાણો (L x W x H) | ૧૮ લિટર x ૧૫ વૉટ x ૧૦ કલાક સેન્ટીમીટર |
વોરંટી અને આધાર
The ZEBRONICS Z310 NVMe Micro-ATX Motherboard comes with a 1-year carry-in service center warranty. For warranty claims or technical support, please contact ZEBRONICS customer service or visit their official webસાઇટ
તમે વધુ માહિતી અને સહાયક સંસાધનો પર શોધી શકો છો ZEBRONICS Store on Amazon.in.
ઉત્પાદન વિડિઓ સમાપ્તview
વિડિઓ: એક સત્તાવાર ઉત્પાદન વિડિઓ શોasing the features and overview of the ZEBRONICS Z310 NVMe Micro-ATX Motherboard.