
1. પરિચય
This manual provides essential information for the proper installation, operation, and maintenance of your Hasaller 4.3 inch 40-pin HD 480x272 TFT LCD Replacement Screen. This product is designed as a direct replacement for compatible car stereo head units, offering clear visuals for navigation and rear-view monitoring. Please read this manual thoroughly before attempting installation or use.

Image 1.1: Hasaller 4.3 inch 40-pin HD 480x272 TFT LCD Replacement Screen.
2. સલામતી માહિતી
- Always disconnect the vehicle's power supply before beginning any installation or repair work to prevent electrical shock or damage to components.
- Handle the LCD screen with care. Avoid applying excessive pressure or impact, as this can damage the display.
- Wear appropriate personal protective equipment, such as anti-static gloves, to prevent electrostatic discharge (ESD) damage to sensitive electronic components.
- Ensure all connections are secure and correctly oriented before restoring power. Incorrect connections can lead to malfunction or damage.
- જો તમને ઇન્સ્ટોલેશન પ્રક્રિયાના કોઈપણ પગલા વિશે ખાતરી ન હોય, તો લાયક વ્યાવસાયિકનો સંપર્ક કરો.
3. પેકેજ સામગ્રી
પેકેજ ખોલતી વખતે કૃપા કરીને ખાતરી કરો કે બધી વસ્તુઓ હાજર છે અને સારી સ્થિતિમાં છે:
- 1 x Hasaller 4.3 inch 40-pin HD 480x272 TFT LCD Replacement Screen
4. સ્પષ્ટીકરણો
| લક્ષણ | સ્પષ્ટીકરણ |
|---|---|
| સ્ક્રીન માપ | 4.3 ઇંચ |
| ઠરાવ | 480 x 272 HD |
| ઈન્ટરફેસ | 40 પિન |
| સામગ્રી | ABS + ગ્લાસ |
| રંગ | Black + Gray (as shown) |
| પરિમાણો (L x W x H) | 15 x 10 x 5 સેમી |
| વજન | 80 ગ્રામ |
| મોડલ નંબર | Q18GGBJ5QF188GWGLV60 |
5. સેટઅપ અને ઇન્સ્ટોલેશન
This replacement screen is designed for direct installation. However, careful attention to detail is crucial for successful replacement.
Important Pre-Installation Check:
ખરીદી પહેલાંasing and installing, it is critical to verify the part number, pin count, and cable position of your original screen against this replacement. Compatibility is universal for 4.3-inch 40-pin screens, but exact matching is necessary.
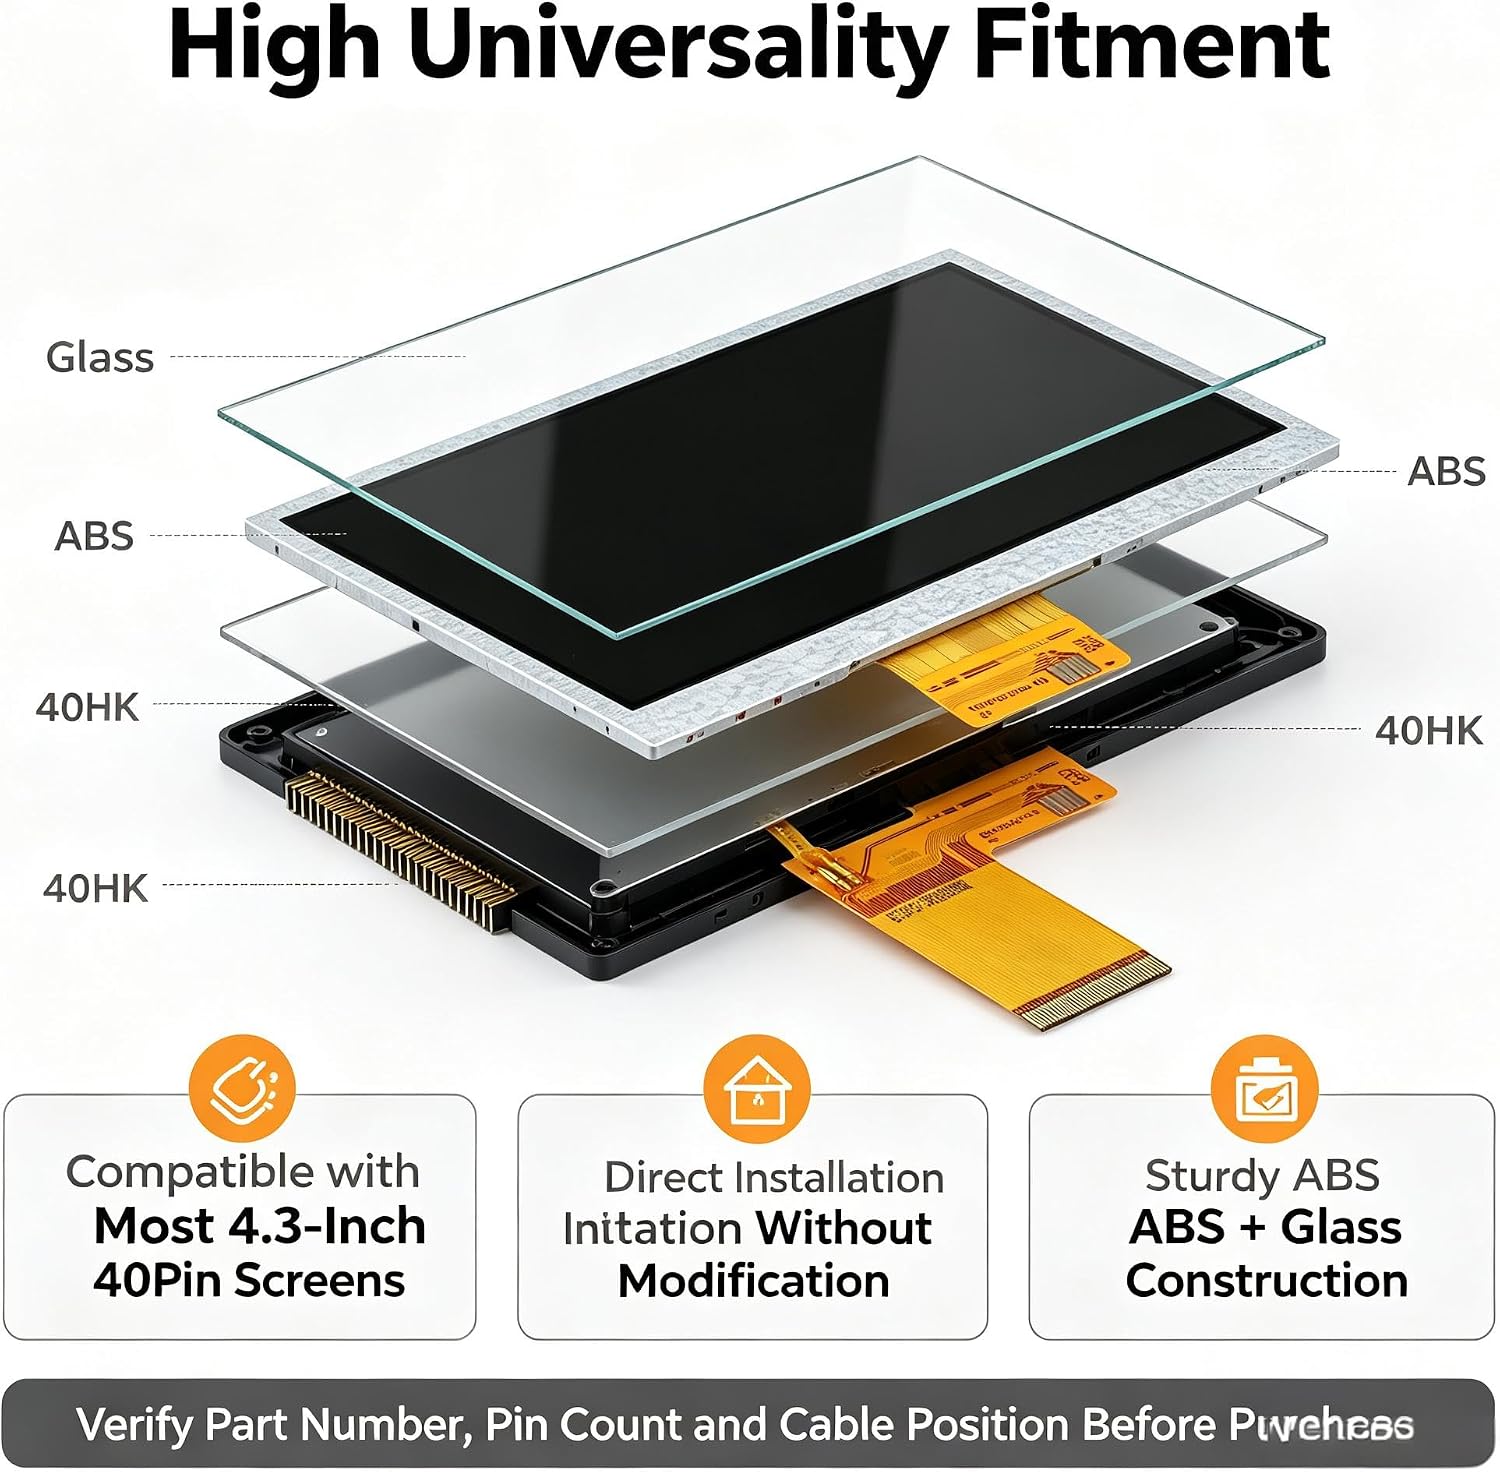
છબી ૪.૨: વિસ્ફોટ થયો view showing screen layers and a reminder to verify part number, pin count, and cable position.
સામાન્ય સ્થાપન પગલાં:
- વાહન તૈયાર કરો: Ensure the vehicle's ignition is off and disconnect the negative terminal of the car battery to prevent electrical hazards.
- હેડ યુનિટ ઍક્સેસ કરો: Carefully remove the car stereo head unit from the dashboard. This may involve removing trim panels and screws. Refer to your vehicle's service manual for specific instructions.
- Disassemble the Head Unit: Open the head unit casing to access the internal components, including the existing LCD screen.
- Disconnect Old Screen: Gently disconnect the ribbon cable and any other connectors attached to the old LCD screen. Carefully remove the old screen.
- નવી સ્ક્રીન ઇન્સ્ટોલ કરો: Position the new Hasaller 4.3 inch LCD screen into place. Ensure it fits securely.
- રિબન કેબલ કનેક્ટ કરો: Carefully connect the 40-pin ribbon cable from the new screen to the corresponding port on the head unit's circuit board. Ensure the connection is firm and correctly aligned.
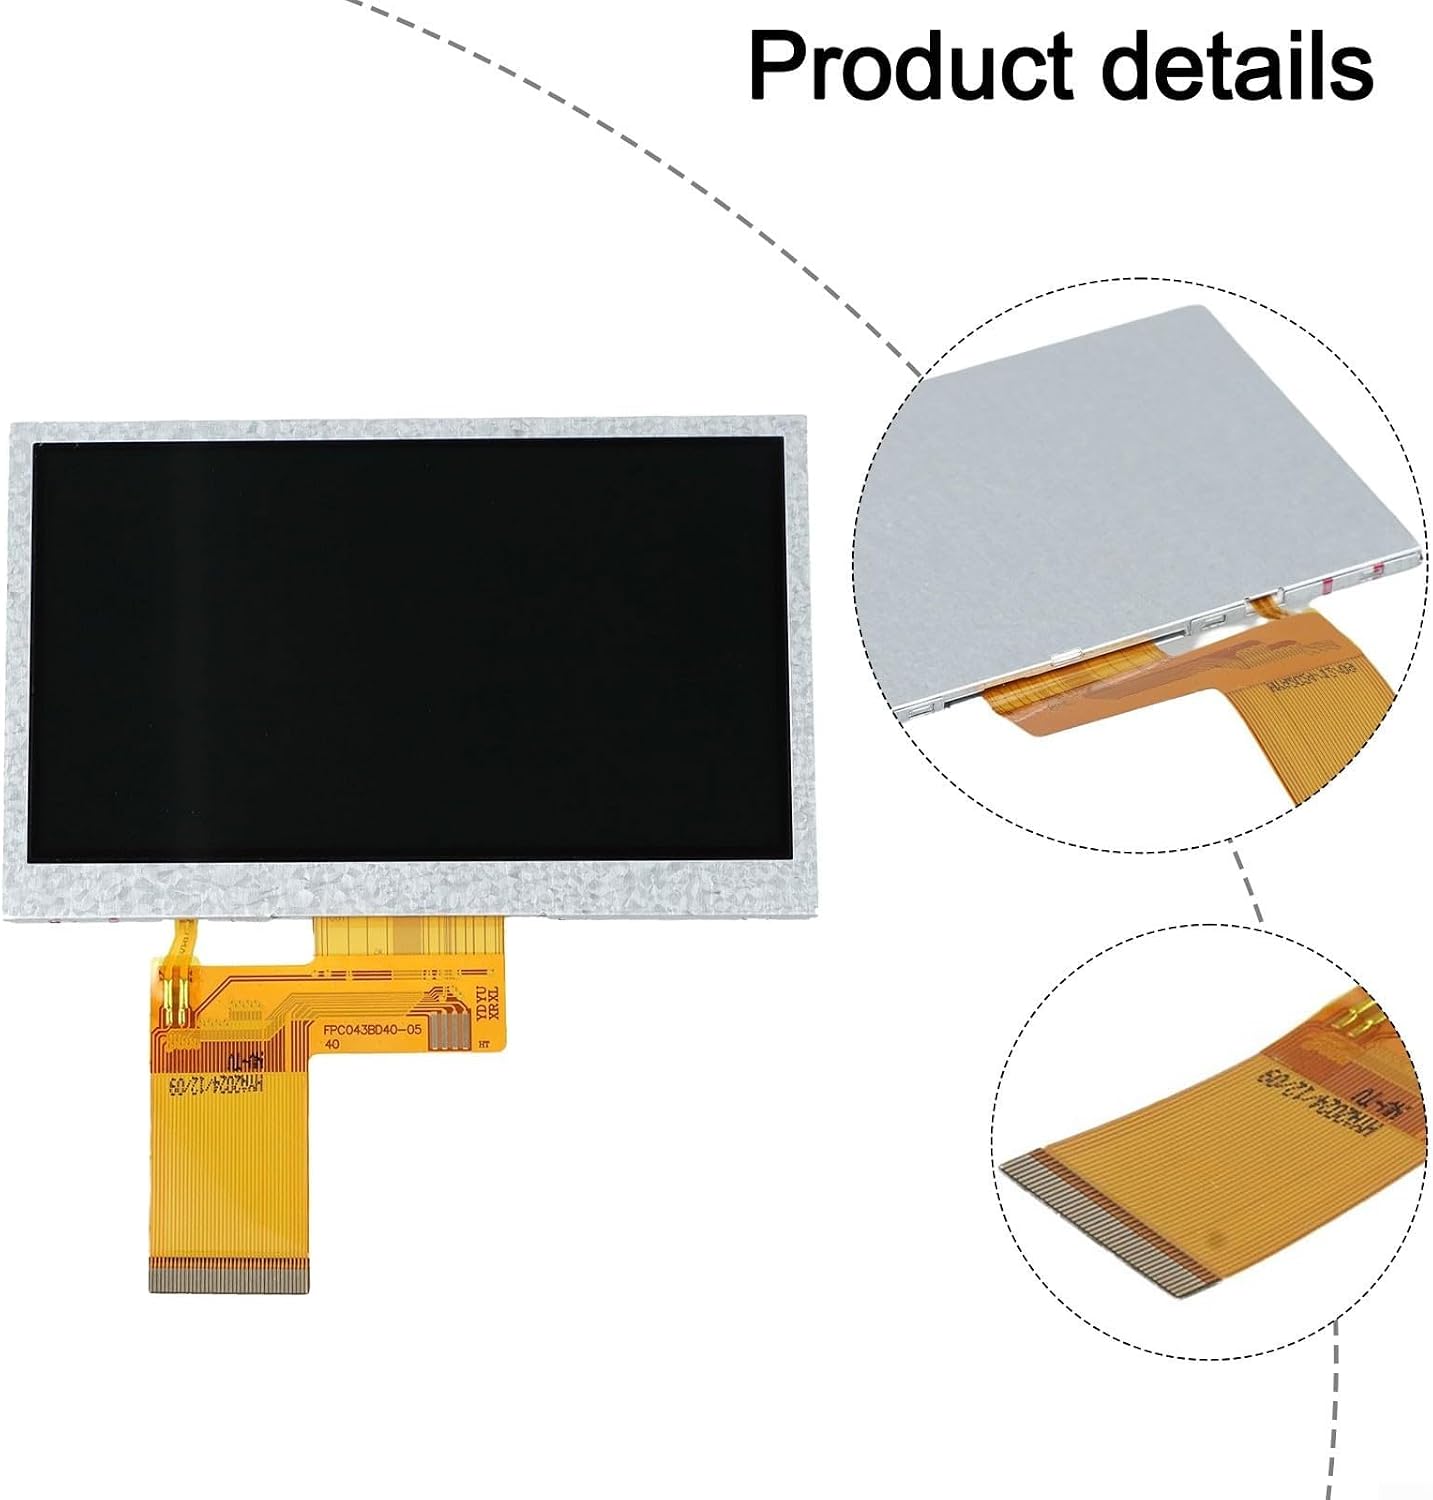
છબી 5.2: ક્લોઝ-અપ view of the 40-pin ribbon cable connection.
- ફરીથી એસેમ્બલ કરો અને પરીક્ષણ કરો: Partially reassemble the head unit and reconnect the car battery. Turn on the vehicle's ignition and test the new screen's functionality. Verify that the display is clear and responsive.
- અંતિમ એસેમ્બલી: If the screen functions correctly, complete the reassembly of the head unit and reinstall it into the dashboard.
6. ઓપરેટિંગ સૂચનાઓ
Once installed, the Hasaller 4.3 inch LCD screen operates as a direct replacement for your original car stereo display. It provides clear and vibrant visuals for various in-car functions.
Key Features in Operation:
- ઉચ્ચ-રીઝોલ્યુશન ડિસ્પ્લે: Enjoy crisp and clear images with the 480x272 HD resolution, enhancing visibility for all displayed content.
- Navigation Support: Provides clear visuals for GPS navigation systems, making directions easy to follow.
- પાછળ View દેખરેખ: Ideal for displaying feeds from rear-view cameras, offering a clear and stable image for safer reversing.
- Car Media Player Integration: Seamlessly integrates with car media player systems, displaying audio/video information and controls.

છબી 6.1: ઓવરview of the 4.3 inch Car LCD Display features.

Image 6.2: The screen providing a clear reverse image for rear-view દેખરેખ

Image 6.3: The screen fitting into car media player systems.
7. જાળવણી
To ensure the longevity and optimal performance of your LCD screen, follow these simple maintenance guidelines:
- સફાઈ: Use a soft, lint-free cloth (e.g., microfiber) to gently wipe the screen surface. For stubborn smudges, slightly dampપાણી અથવા સ્ક્રીન-વિશિષ્ટ સફાઈ દ્રાવણથી કાપડને સાફ કરો.
- કઠોર રસાયણો ટાળો: Do not use abrasive cleaners, alcohol, ammonia-based solutions, or solvents, as these can damage the screen coating.
- અસરથી બચાવો: While durable, avoid dropping or subjecting the screen to strong impacts.
- તાપમાન: Avoid exposing the screen to extreme temperatures for prolonged periods, as this can affect its performance and lifespan.
8. મુશ્કેલીનિવારણ
If you encounter issues with your replacement screen, refer to the following common problems and solutions:
Problem: Screen is blank or shows no image.
- પાવર તપાસો: Ensure the car stereo head unit is receiving power and is turned on.
- કનેક્શન્સ તપાસો: Verify that the 40-pin ribbon cable is securely and correctly connected to both the screen and the head unit's circuit board. A loose or misaligned connection is a common cause.
- સુસંગતતા: Double-check that the screen's specifications (part number, pin count, resolution) are fully compatible with your car stereo head unit.
Problem: Image is distorted, flickering, or has incorrect colors.
- કનેક્શન્સ તપાસો: Re-verify the ribbon cable connection for any bent pins or improper seating.
- Source Signal: Ensure the input signal from the head unit is stable and correct. Test other functions of the head unit if possible.
- નુકસાન: Inspect the screen for any physical damage that might have occurred during installation or handling.
જો આ પગલાંઓથી સમસ્યાનો ઉકેલ ન આવે, તો વધુ સહાય માટે કૃપા કરીને ગ્રાહક સપોર્ટનો સંપર્ક કરો.
9. વોરંટી અને સપોર્ટ
વોરંટી માહિતી અથવા તકનીકી સહાય માટે, કૃપા કરીને તમારી ખરીદી સાથે પૂરા પાડવામાં આવેલ દસ્તાવેજોનો સંદર્ભ લો અથવા વેચનારનો સીધો સંપર્ક કરો. કોઈપણ વોરંટી દાવા માટે તમારી ખરીદીનો પુરાવો રાખો.