1. પરિચય
Thank you for choosing the CREATE NETBOT S40 Robot Vacuum and Mop. This manual provides essential information for the safe operation, maintenance, and troubleshooting of your device. Please read it thoroughly before first use and retain it for future reference.
2. સલામતી સૂચનાઓ
ઈજા અથવા નુકસાનનું જોખમ ઘટાડવા માટે, નીચેની સલામતી સાવચેતીઓનું પાલન કરો:
- આ ઉપકરણનો ઉપયોગ 8 વર્ષ અને તેથી વધુ ઉંમરના બાળકો અને ઓછી શારીરિક, સંવેદનાત્મક અથવા માનસિક ક્ષમતાઓ અથવા અનુભવ અને જ્ઞાનનો અભાવ ધરાવતી વ્યક્તિઓ દ્વારા કરી શકાય છે જો તેઓને ઉપકરણના સલામત રીતે ઉપયોગ કરવા અંગે દેખરેખ અથવા સૂચના આપવામાં આવી હોય અને તેમાં સામેલ જોખમોને સમજતા હોય. .
- બાળકોએ ઉપકરણ સાથે રમવું જોઈએ નહીં. દેખરેખ વિના બાળકો દ્વારા સફાઈ અને વપરાશકર્તા જાળવણી કરવામાં આવશે નહીં.
- Ensure the robot is placed on a stable, level surface.
- Do not expose the robot to water or other liquids.
- વાળ, ઢીલા કપડાં, આંગળીઓ અને શરીરના તમામ ભાગોને ખુલ્લા અને હલનચલનથી દૂર રાખો.
- ખુલ્લી જ્વાળાઓ અથવા વિસ્ફોટક પદાર્થોવાળા વિસ્તારોમાં રોબોટનો ઉપયોગ કરશો નહીં.
- Use only the original charging adapter and battery provided by the manufacturer.
- Before cleaning or maintenance, always switch off the robot and unplug it from the power source.
3. પેકેજ સામગ્રી
ખાતરી કરો કે બધી વસ્તુઓ તમારા પેકેજમાં હાજર છે:
- CREATE NETBOT S40 Robot Vacuum and Mop
- ચાર્જિંગ ડોક
- પાવર એડેપ્ટર
- રીમોટ કંટ્રોલ
- સાઇડ બ્રશ (2 જોડી)
- Main Brush (pre-installed + 1 spare)
- ડસ્ટ બિન
- Water Tank with Mop Pad
- સફાઈ સાધન
- વપરાશકર્તા માર્ગદર્શિકા
4. ઉત્પાદન ઓવરview
Familiarize yourself with the components of your CREATE NETBOT S40.

છબી ૧.૧: ટોચ view of the CREATE NETBOT S40 robot vacuum, showing the main unit, a roller brush, a smartphone displaying the control app, and the remote control.

છબી ૩.૧: નીચે view of the robot, illustrating the main brush, side brushes, wheels, and various sensors.
રોબોટ ઘટકો
- ટોચનું કવર: Houses the dust bin/water tank.
- પાવર/સ્ટાર્ટ બટન: Initiates or pauses cleaning.
- ચાર્જિંગ સંપર્કો: For automatic charging at the dock.
- સાઇડ બ્રશ: Sweep debris into the main brush path.
- મુખ્ય બ્રશ: Collects dust and debris from the floor.
- ડસ્ટ બિન: Collects dry debris.
- પાણીની ટાંકી: ધોવા માટે પાણી રાખે છે.
- મોપ પેડ: Attaches to the water tank for wet cleaning.
- ક્લિફ સેન્સર્સ: Detect edges and prevent falls.
- બમ્પર: અવરોધો શોધે છે.
- ડ્રાઇવિંગ વ્હીલ્સ: રોબોટને આગળ ધપાવો.
- યુનિવર્સલ વ્હીલ: Provides steering.

Image 4.3: Close-up of the robot's top cover, showing the 'CREATE NETBOT S40' branding.
5. સેટઅપ
૩.૨ ચાર્જિંગ ડોક પ્લેસમેન્ટ
Place the charging dock against a wall in an open, uncluttered area. Ensure there is at least 1 meter (3 feet) of clear space on both sides and 2 meters (6 feet) in front of the dock. Plug the power adapter into the dock and then into a wall outlet.

Image 5.1: The robot positioned next to its charging dock, illustrating proper placement.
5.2 પ્રારંભિક ચાર્જિંગ
Place the robot onto the charging dock, ensuring the charging contacts align. The robot will emit a sound and the indicator light will illuminate, indicating it is charging. Fully charge the robot for 4-6 hours before its first use.
5.3 App Connection (Wi-Fi & Alexa)
For full functionality, download the CREATE Home app from your smartphone's app store. Follow the in-app instructions to connect your NETBOT S40 to your home Wi-Fi network. Once connected, you can link the app to Alexa for voice control.
- Download the 'CREATE Home' app.
- તમારા ખાતામાં નોંધણી કરો અથવા લ logગ ઇન કરો.
- Add your device by selecting 'Robot Vacuum' and following the pairing instructions.
- ખાતરી કરો કે તમારું Wi-Fi નેટવર્ક 2.4GHz છે.

Image 5.2: The robot shown alongside a smartphone displaying the CREATE Home app interface, indicating successful connection and mapping capabilities.
6. ઓપરેટિંગ સૂચનાઓ
૫.૧ સફાઈ શરૂ કરવી/થોભાવવી
- રોબોટ તરફથી: Press the power button on the robot's top cover.
- From Remote Control: 'સ્ટાર્ટ/પોઝ' બટન દબાવો.
- એપ્લિકેશનમાંથી: Tap the 'Start' button in the CREATE Home app.
6.2 સફાઈ મોડ્સ
The NETBOT S40 offers various cleaning modes:
- સ્વતઃ સફાઈ: આ રોબોટ બુદ્ધિપૂર્વક સમગ્ર ફ્લોર એરિયાને નેવિગેટ કરે છે અને સાફ કરે છે.
- સ્પોટ સફાઈ: ચોક્કસ નાના વિસ્તાર પર સફાઈ કેન્દ્રિત કરે છે.
- ધારની સફાઈ: દિવાલો અને ફર્નિચરની કિનારીઓ સાફ કરે છે.
- સુનિશ્ચિત સફાઈ: એપ દ્વારા રોબોટ આપમેળે સાફ થાય તે માટે ચોક્કસ સમય સેટ કરો.
6.3 મોપિંગ કાર્ય
મોપિંગ ફંક્શનનો ઉપયોગ કરવા માટે:
- Fill the water tank with clean water. Do not use detergents or harsh chemicals.
- પાણીની ટાંકી સાથે મોપ પેડ સુરક્ષિત રીતે જોડો.
- ભરેલી પાણીની ટાંકી રોબોટમાં દાખલ કરો.
- Start a cleaning cycle. The robot will vacuum and mop simultaneously.

છબી 6.1: ક્લોઝ-અપ view of the mop pad attached to the water tank, ready for installation into the robot.
7. જાળવણી
નિયમિત જાળવણી શ્રેષ્ઠ કામગીરી સુનિશ્ચિત કરે છે અને તમારા રોબોટનું આયુષ્ય લંબાવે છે.
7.1 Dust Bin and Filter Cleaning
Empty the dust bin after each use and clean the filter regularly.
- Press the release button to remove the dust bin.
- Open the dust bin cover and empty its contents.
- Remove the filter and tap it gently to remove dust. Do not wash the HEPA filter with water.
- જો જરૂરી હોય તો ડસ્ટબિનને પાણીથી ધોઈ લો, ખાતરી કરો કે ફરીથી ઇન્સ્ટોલ કરતા પહેલા તે સંપૂર્ણપણે સુકાઈ ગયું છે.
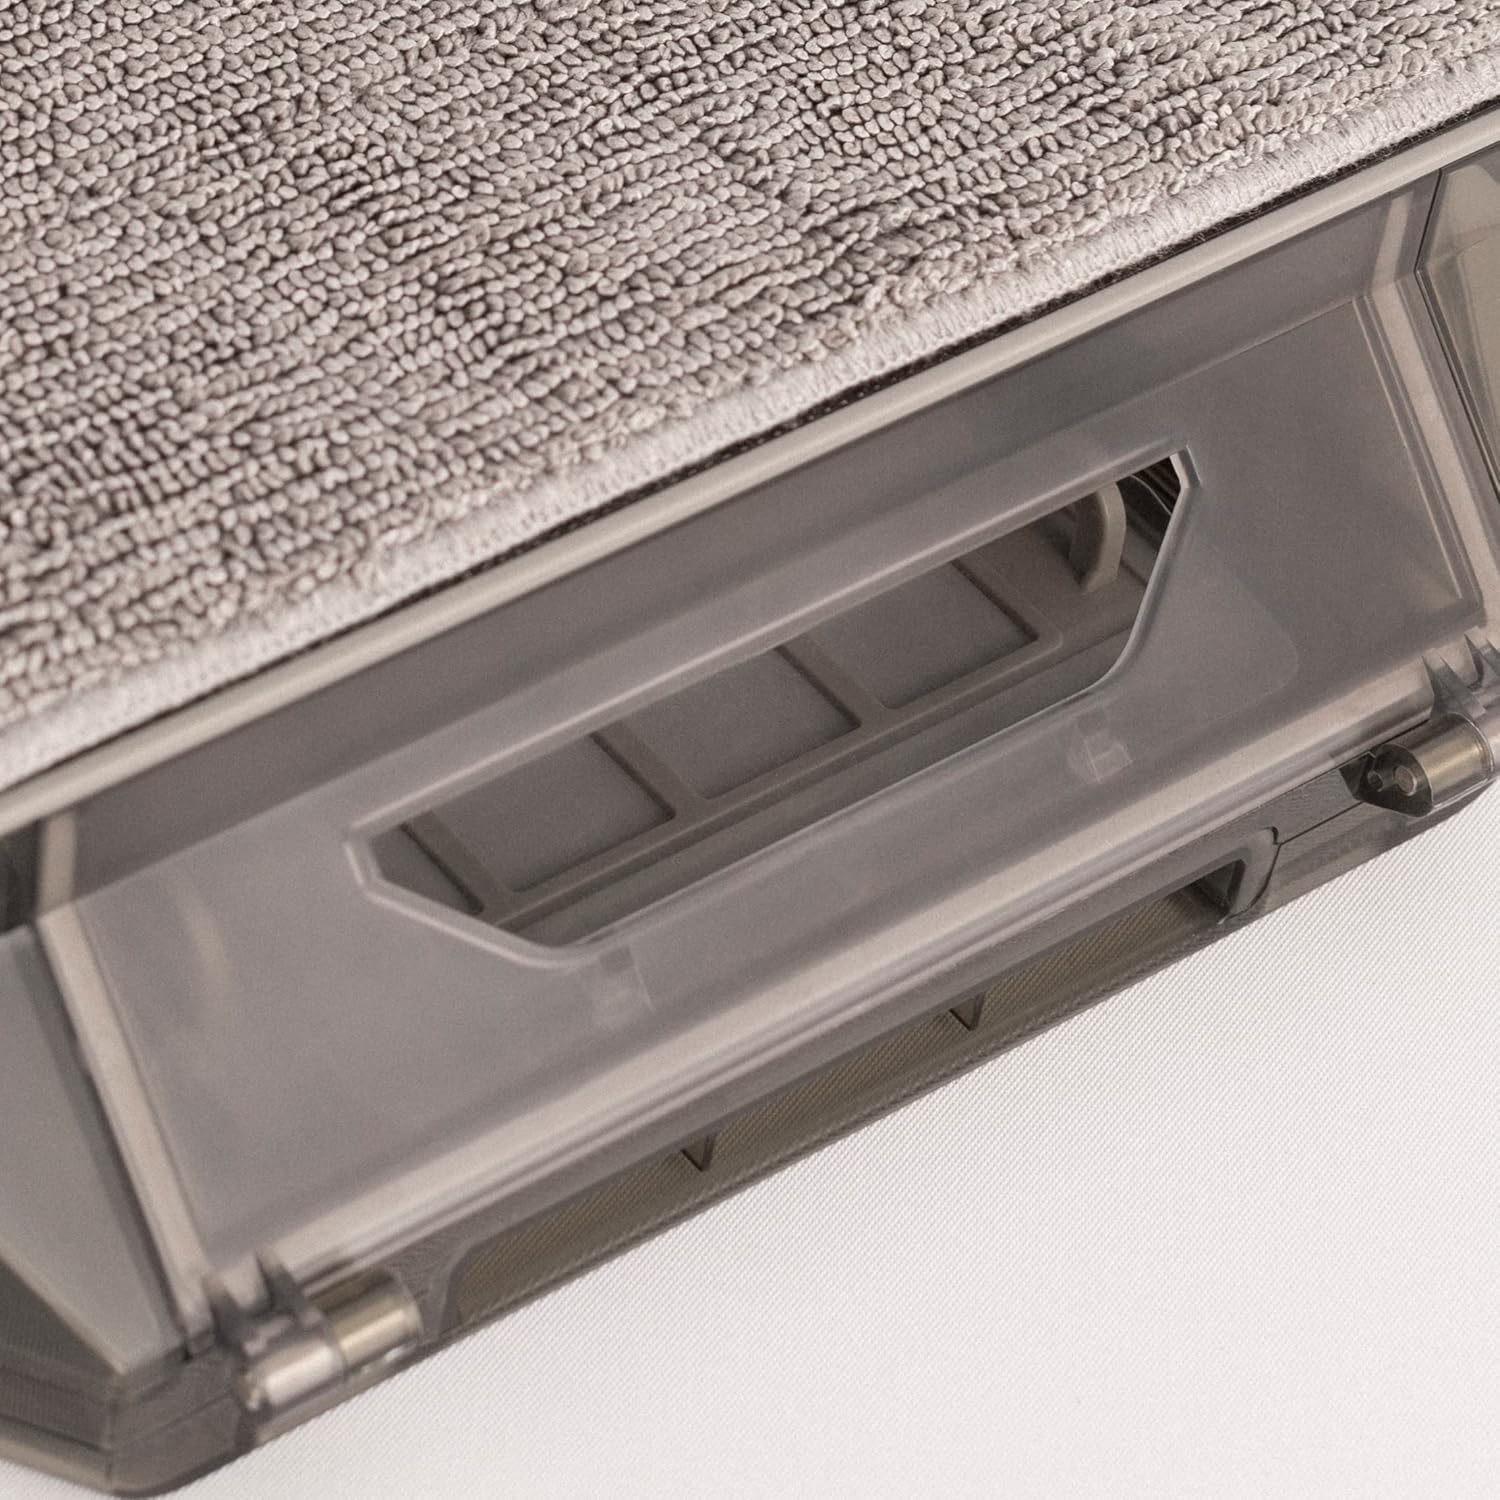
છબી 7.1: વિગતવાર view of the dust bin and its filter compartment, showing how it integrates into the robot.
7.2 Main Brush Cleaning
Clean the main brush weekly to remove tangled hair and debris.
- Turn the robot over and locate the main brush cover.
- Remove the cover and lift out the main brush.
- Use the provided cleaning tool to cut and remove tangled hair.
- મુખ્ય બ્રશ અને કવર ફરીથી ઇન્સ્ટોલ કરો.
૪.૨ સાઇડ બ્રશ ક્લીનિંગ
Inspect side brushes regularly for wear and tear, and clean them as needed.
- બાજુના બ્રશને દૂર કરવા માટે ધીમેધીમે ઉપર ખેંચો.
- Remove any hair or debris.
- If brushes are damaged, replace them with new ones.
- Press the new brushes firmly onto their posts until they click into place.
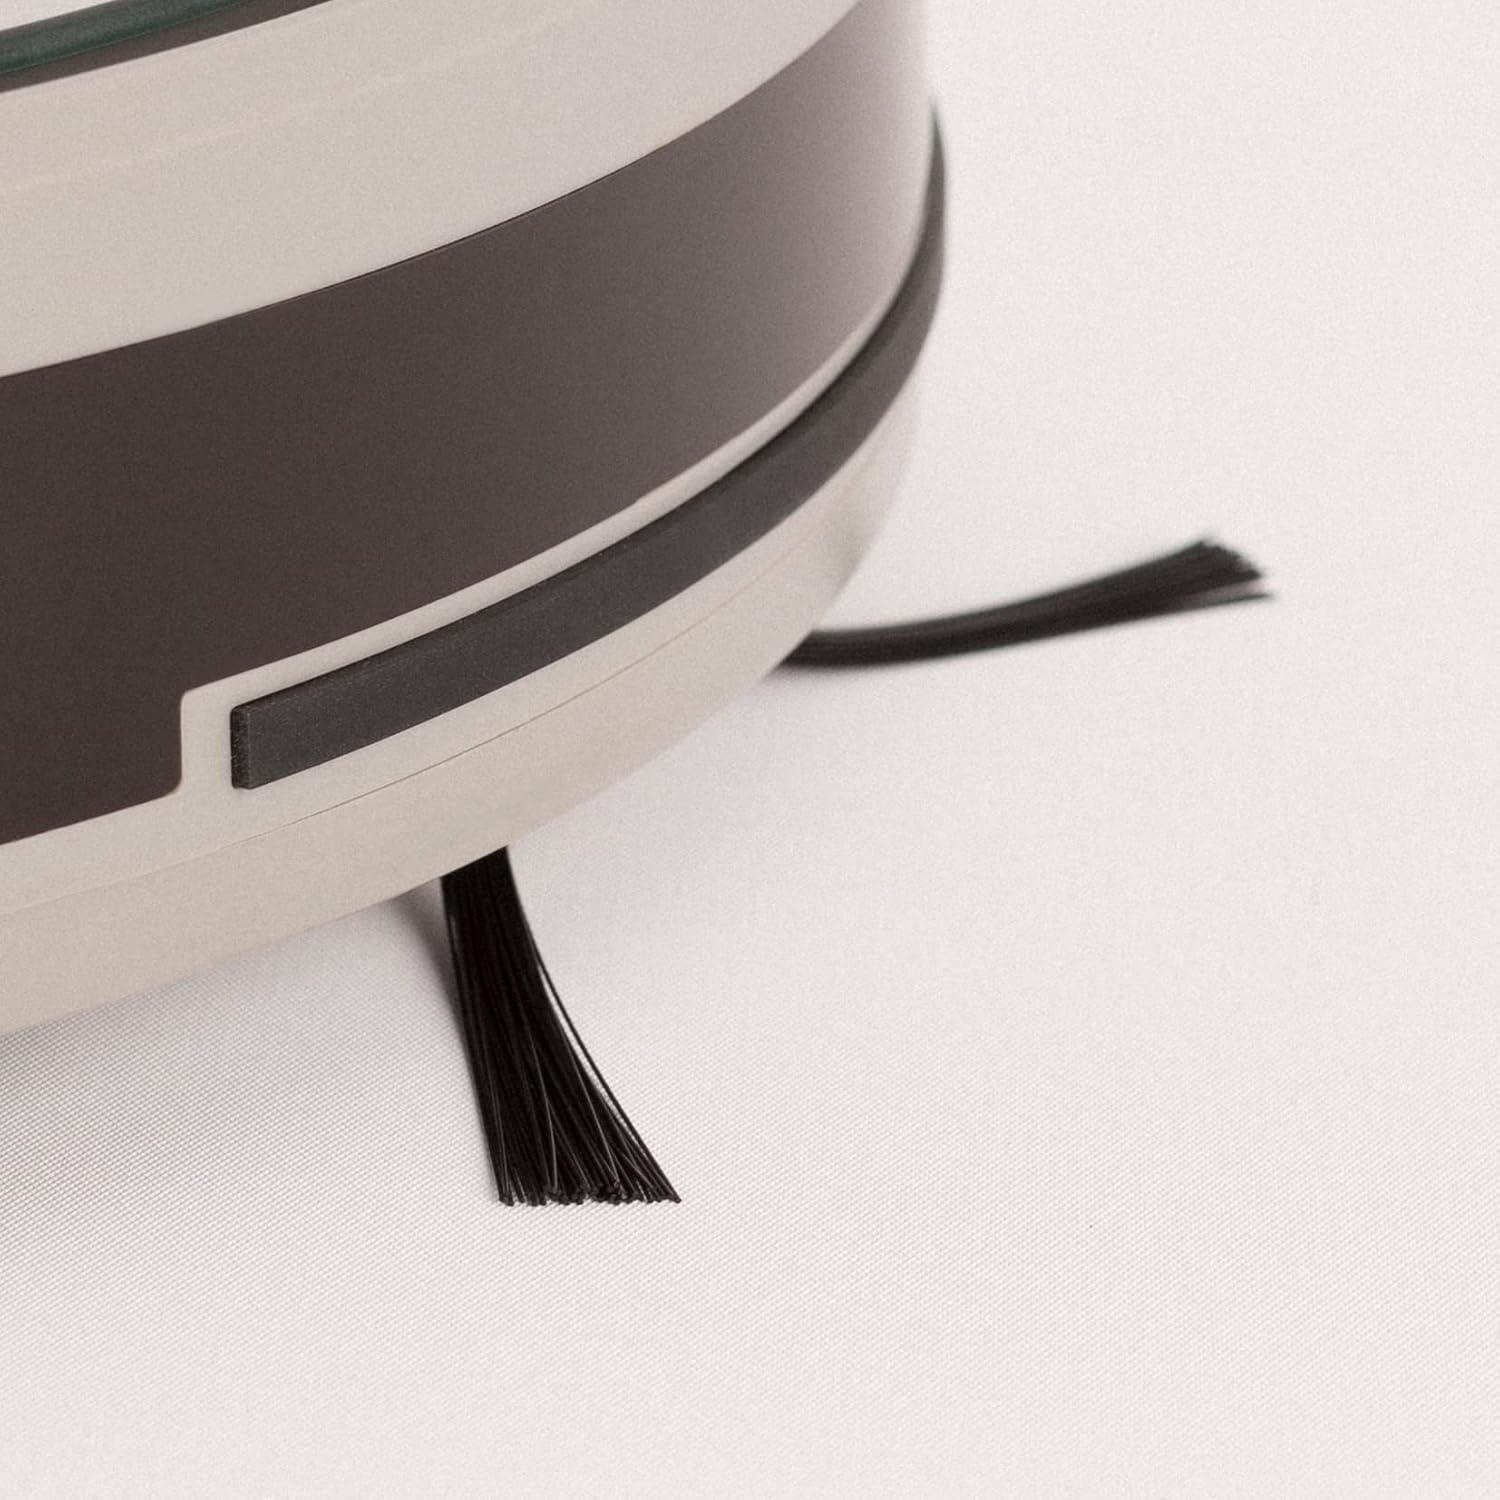
Image 7.2: Close-up of a side brush, showing its bristles and attachment point.
7.4 Water Tank and Mop Pad Cleaning
After each mopping session:
- ટાંકીમાંથી કોઈપણ બાકીનું પાણી ખાલી કરો.
- Remove the mop pad and rinse it thoroughly with water. Allow it to air dry.
- જાહેરાતથી પાણીની ટાંકી સાફ કરોamp કાપડ
7.5 સેન્સર સફાઈ
Wipe all sensors (cliff sensors, bumper sensor) with a clean, dry cloth monthly to ensure proper navigation.
8. મુશ્કેલીનિવારણ
If you encounter issues with your robot, refer to the following table:
| સમસ્યા | સંભવિત કારણ | ઉકેલ |
|---|---|---|
| રોબોટ ચાલુ થતો નથી | બેટરી ઓછી છે; પાવર સ્વીચ બંધ છે | રોબોટ ચાર્જ કરો; ખાતરી કરો કે પાવર સ્વીચ ચાલુ છે. |
| રોબોટ ચાર્જ કરી શકતો નથી | ચાર્જિંગ કોન્ટેક્ટ ગંદા છે; ડોક પાવરથી ચાલતું નથી | Clean charging contacts; Check power adapter connection |
| Cleaning performance is poor | ડસ્ટબિન ભરેલું; બ્રશ ગૂંચવાયેલા; ફિલ્ટર ભરાયેલું | Empty dust bin; Clean main/side brushes; Clean/replace filter |
| રોબોટ વારંવાર અટવાઈ જાય છે | Obstacles on floor; Cliff sensors dirty | Clear floor area; Clean cliff sensors |
| એપ્લિકેશન કનેક્શન નિષ્ફળ ગયું | Incorrect Wi-Fi password; Router too far; 5GHz Wi-Fi | Verify password; Move robot closer to router; Ensure 2.4GHz Wi-Fi |
જો સમસ્યા ચાલુ રહે, તો કૃપા કરીને ગ્રાહક સપોર્ટનો સંપર્ક કરો.
9. સ્પષ્ટીકરણો
- બ્રાન્ડ: બનાવો
- મોડલ નામ: NETBOT S40
- મોડલ નંબર: 130436_269434
- સક્શન પાવર: 4000 Pa (as per product description)
- બેટરી જીવન: Up to 220 minutes (as per product description)
- કનેક્ટિવિટી: Wi-Fi, App Control, Alexa compatible
- પરિમાણો: 64 x 40 x 12 cm (package dimensions)
- વસ્તુનું વજન: 116 Grams (as per specifications, likely product weight is higher, but using provided data)
- બેટરી સમાવાયેલ: હા
10. વોરંટી અને સપોર્ટ
Your CREATE NETBOT S40 comes with a standard manufacturer's warranty. Please refer to the warranty card included in your package for specific terms and conditions, including warranty period and coverage.
For technical support, troubleshooting assistance, or to inquire about replacement parts, please contact CREATE customer service through their official webસાઇટ અથવા તમારા ઉત્પાદન દસ્તાવેજોમાં આપેલી સંપર્ક માહિતી.


